Thursday, March 29, 2012

Use It Up or Wear It Out

I have three boys.  Twin 3-year-olds and an 18-month-old.  They go through a lot of clothes.

Fortunately for me (maybe not so much for him) my youngest has a gajillion hand-me-downs from the twins.  It's nice because I don't have to spend a ton of money on dressing him, although, don't feel too sorry for him...he still gets plenty of new stuff bought just for him.  (One of the perks of being born in the opposite season as his brothers.  And being a huge chunky-monkey.)

However, sometimes, things get a little worn out before they get passed down to my baby, mainly sleepers.  You know what I mean.  You've got a perfectly good sleeper that still looks nice and warm and cozy until you see this:


And honestly, I just can't bring myself to throw away a perfectly good sleeper that still has miles of good use left in it when I can easily fix it for literally a few cents. 

A few cents?  Well, yes.  I get the non-skid fabric with a coupon at JoAnn's.  I think it is normally $6.99/yd, so with a 40% coupon it is around $4 a yard.  I get a quarter yard (grand total = $1) and can get quite a few sleeper feet out of it.  So depending on how many sleepers you need to fix, you are literally paying pennies for each pair of replacement feet.


And while I may not be that great at math, I know that a few cents per sleeper to fix is a heck of a lot cheaper than buying a whole winter's (and fall and spring) worth of new ones!

So, That is what I do.  And I will be the first to admit that I don't worry about perfection when it comes to  replacing the soles of these sleepers.  In fact, all I do is cut the old sole out, and closely zigzag the new sole on. 

This is the inside of the foot before it is turned right-side out.

 I don't even worry about unpicking the old thread or whether any part of the old soles shows through slightly, as you can see:


The point for me is to get the new soles on and fix these suckers so that my boys can use them up or wear them out.  Again.


Wednesday, March 28, 2012

Your Friendly Neighborhood Spiderman (And WIP Wednesday #3)


Creative Itch

Lil\'LunaWIP Wednesday at Freshly PiecedCreations by Kara
 
(Linking to these parties)

So, I have twin 3-year-old boys.  They love Spiderman. 

LOVE. SPIDERMAN.

And one of my sons in particular loves to put things inside another thing and carry said things around.  And it doesn't matter what the carrying object is...a bucket, a bag, a sock...really it doesn't matter.

And then there is the matter of church. 

In our church, the main meeting is attended by the whole family (i.e: no nursery), and lasts for 70 minutes, give or take.  Obviously, as the mom of three little ones, I have learned that distractions are necessary.  But because of that, I have ended up loading my own bag with flip books, cards, dominoes, sparkle pom poms, coloring books, etc.

My shoulders ache by the end of church after hauling all the boys booty around, besides my own books and binders.

So I thought, "Hey, they are THREE WHOLE YEARS OLD now.  How about making them their own tote bags to carry their own stuff around in?"  Genius, I know.

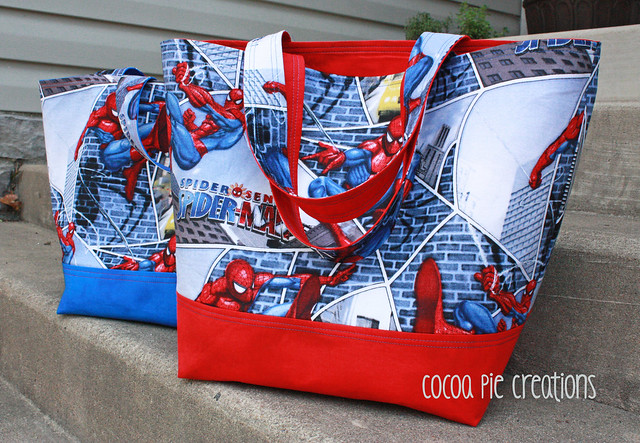
And that is how the Spiderman Totes came to be.
Spidey Totes

I used the tutorial for the Market Tote found HERE.

I made the blue one first, and while it came together very easily, there were a few things I did differently on the second, red one, some intentionally, and others not so intentionally.

First thing I did differently, was trim the seam allowance for the liner before assembling the bag so that it wasn't quite so bulky.  I could feel the untrimmed liner seams on the inside of the blue one and it bothered me.

Second thing I did a little different was I used a slightly heavier weight interfacing on the red one.  This change was the unintentional one (I ran out of interfacing and bought more at a different store which didn't have the exact same interfacing I had been using), but I have to say, I actually ended up preferring it this way. 

You can't really tell in the photo, but the red tote stands up fairly well on its own, whereas the blue one is relatively soft and doesn't stand up quite so well.  I know that will all change anyway, once the boys get their hands on them and mush the whole bag to pieces, but based on the pristine, untouched finish, I prefer the heavier weight interfacing.

The only other thing I did differently was cut 2 inches off (in both directions) the original measurements.  I wanted them to be smaller, since they were for 3-year-olds.  However, they STILL ended up being a bit large.  I knew I wanted them big enough to carry coloring books plus other stuff, but I didn't really take into consideration the depth of the sides when I was reducing the pattern.  If I make them again for little people, I will probably take off 4 inches.

I can say, however, that the twins are quite pleased.  I just finished the second one this morning and already that they have been filled to the brim with golf balls, trucks, cars, Buzz and Woody. 

So I can cross this project off my list.  YAY!

And I decided to take my Christmas Tree Skirt with me on my trip to Tennessee/Utah next week to have something to do, so that is on hold for a week.

WIP Stats
WIP's Finished - 1
WIP's Worked On - 1
New WIP's - 0
TOTAL WIP's - 5


Sunday, March 25, 2012

Upgrading

Somehow, this weekend I have managed to find some sewing time so I have been working on the Spiderman Totes for my twins.  I ran out of interfacing halfway through cutting it for the second tote, so instead of doing them in tandem like I originally planned, I just kept going on the one that I had all interfaced and now have it almost done.  It will make the second one come together like a breeze, I'm sure! 

They are turning out fabulously cute, if I dare say so myself.  They are also way bigger than I had originally intended, despite trimming two inches off during the cutting.  But with all the traveling we will be doing this summer, that may not be a bad thing.  More room for weird boy-stuff storage.

When I finally got to a store to get the interfacing, I decided to upgrade my rotary cutter to an ergonomic version. 

Carpal Tunnel and pricked fingers
I developed carpal tunnel when I was pregnant with my last son, and if I do too much sewing over an extended period of time, it comes back in the form of my hands falling asleep at night while I am sleeping.  Nothing like waking up from a sound sleep with hands full of pins and needles!  I'm hoping this new cutter will help some.

However, I am one who doesn't like to replace something if it is still working fine, and my old rotary cutter was still in perfect shape.  And I have had it for at least 10 years.  It was a Christmas gift from my sister many Christmases ago.

But I was able to justify a new one like this:  My dear husband bought me a rockin' new Bernina Artista 730 for Christmas.  I had been using my mom's old mechanical Bernina 1001.  Now that I have my new machine, I am giving my mom's back to her.  My mom has no sewing equipment whatsoever.  So I will gift her the rotary cutter (as well as a darning foot and a walking foot that I had purchased) when I give back her machine.

It's the least I could do for her letting me "borrow" her machine for the past eight years, don'tcha think?

I also picked up an adjustable gel thimble for binding.  I always end up pushing the needle through with a thick part with the quilt to protect my finger, and get poked more often than I want.  So That is an upgrade too, I suppose.  From nothing to something.  

Here is to prick-free fingers.  I hope. 


Wednesday, March 21, 2012

WIP Wednesday #2

WIP Wednesday at Freshly Pieced

 I wish I could say that I accomplished more this past week, but I didn't.

But considering that we drove from Virginia to Ohio over the weekend with 2 out of 3 kids still sick, I am amazed I got ANYTHING accomplished at all!  We drove significant mileage pretty much every day from Thursday when we left, through Monday when we got home. 

Then, of course, the day after we got home, I had to do some grocery shopping since I had put it off till after out trip.  And the twins went back to preschool after missing the entire previous week due to the horrible stomach flu that is going around out here in the South.  And I had to drive The Hubs to the train station at 7am since we left his car at his work when we left for the trip.

So even though I have been home for almost 2 days now, yesterday was pretty much wasted just catching things up around here. However, I am happy to say that we left all our illness in Ohio and everyone arrived home finally recovered from The Plague, as I took to calling it.

So, which of my WIP's were worked on?  Only two, and neither one got finished. 

I did take my Christmas Tree Skirt on the trip, and did manage to get a start on the binding.  However, I am not even halfway done yet.

Tree Skirt WIP week 2

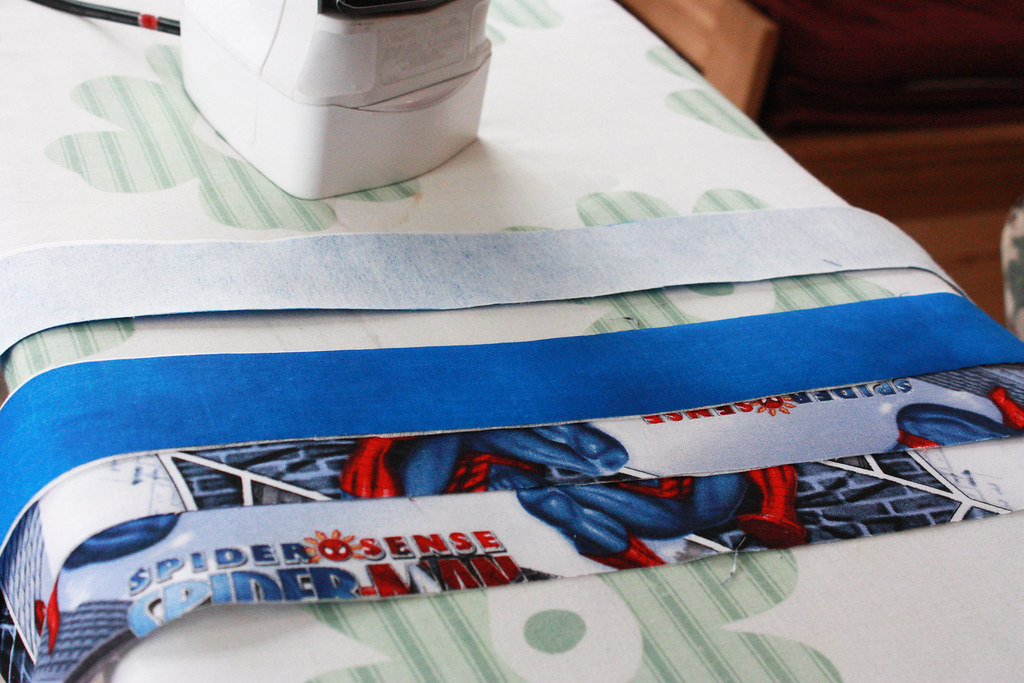
The only other project I worked on was the boys Spidey Totes.  Obviously, I couldn't really take this one with me, but while I was out shopping yesterday I was able to get some interfacing, so I have been cutting and fusing.

Spidey Totes WIP week 2

I wish I could say that I will have more time this coming week, but things are actually going to be pretty hectic in our family from now until after Easter.  It has made me think that maybe I need to start another project I can take and work on by hand. 

Maybe a Cathedral Window pillow?

Or is it time to try my hand at applique?

WIP Stats
Total WIP's: 6
WIP's worked on this week: 2
WIP's Finished: 0

Wednesday, March 14, 2012

WIP Wednesday #1

I decided to start linking to WIP (work-in-progress) Wednesdays at Freshly Pieced when I opened my (disgustingly messy) craft closet and noticed how many sad, lonely WIP's I have collected! 

This is usually not like me.  As I have said, I try to work on a project fairly consistently until it is done.  However, some way, some how, I seem to have started a little pile of lonelies over the past few months.

I am hoping that being accountable each Wednesday will help push me to finish these projects, especially BEFORE I try to start any more!

So, here, in no particular order, are my little lonelies:

 WIP #1 - Spiderman Totes - This one hasn't actually been lonely.  I bought the fabric this past week and have been working to get them done by next Sunday.  I am making totes for the twins to fill with activities and take to church with them.  I have all the pieces cut out, I just need to get some interfacing before I can sew them up.


 WIP #2 - The Twins Fundraiser Quilt - Obviously, this is the project that is furthest along.  It has been on hold for about a week, because I decided to put a border on it and had to go get some off-white fabric, since the white I had in my stash was WAY too stark.  But I got the fabric, so I should be getting the border on this next week sometime. 


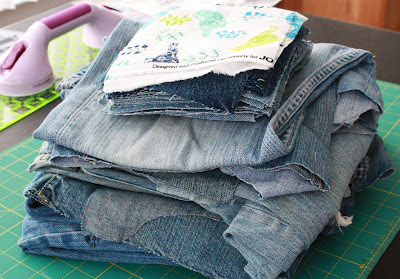
WIP # 3 - Denim Rag Quilt - This has been a long running WIP.  My Husband is very hard on his jeans and goes through them pretty quickly.  A few years ago, when he had a stack that were ripped and stained beyond repair, I decided rather than waste all that denim, I would make a large, picnic-sized rag quilt with it instead.  You know, for 4th of July and other fun times when you just need a big ole' quilt to sit on. 

Above is the stack I have cut out so far.  Cute little pile, isn't it? 

Unfortunately, below is a picture of that cute little stack on top of the huge pile of jeans I still have to cut out.  This one has been on my mind for a bit.  I want to at least get all these jeans cut into 5-inch squares as the next step toward finishing this massive project.  And I want it done soon.
(Big pile of cut up jeans to cup up even smaller.) 


 WIP #4 - Star Baby Quilt - This poor little quilt has been neglected for quite awhile.  There is a story to this quilt.  When my twins were born, they had matching brown and blue star bedding.  Well, when my third son was born, I couldn't bring myself to buy a whole new bedding set when I had two perfectly good ones that weren't being used.  The problem, however, is that neither twin wanted to give up the quilts that went with the rest of the bedding.  So, being the thrifty (read: cheap) mama that I am, I decided to cut apart one set of the bumpers & crib skirt to make a simple, new quilt for Boy #3. 

Problem is, I really don't love the fabrics, and I have had a very hard time finding co-ordinating fabrics to fill it out.  So I was more than happy to shove this little guy to the back of my WIP basket and forget about it. 

Now, Baby Boy #3 is almost 18 months old, and still no quilt.  I figure he will probably be in his crib for maybe another year, so if I want him to have his matching quilt before he grows out of his bedding altogether, I'd better move this project to the top of the pile!


 WIP #5 - SWOON, aka: TBQ - Yes, the quilt that prompted me to even start this blog has been rather neglected, with the pieces of only one square even cut out.  And even then, I think if I counted, I would find that I haven't even finished doing that!  Sad, sad, sad.  I will get back to her, but I really do need to get the Fundraiser Quilt out of my hair before I can pay Swoon the attention she deserves!


WIP #6 - Christmas Tree Skirt.  From LAST Christmas - Yes, my poor Christmas tree skirt that I spent so much time on last fall never even got bound before Christmas.  I still put it under the tree, but I wanted to hand bind it, and with all the gifts I ended up making for Christmas, I just didn't have the time to sit down and do it.  I even thought I would get it done before I packed up all my Christmas stuff, and yet, here it still sits, unbound and lonely. 

But, good news, I am going to Ohio this weekend, and I think I will swallow some Dramamine and see if I can't get her bound on the drive.  So hopefully I will be able to cross her off the list by next week!

So there you are, my sad little pile of lonelies.  Even with traveling this weekend, I plan to get some work done on all of them (except Swoon and the Star Baby Quilt. Sad.)  We are going to celebrate St. Paddy's with my Husband's Irish family.  So, here is to a weekend of green things and sore fingers!

Linking to
WIP Wednesday at Freshly Pieced

Tuesday, March 13, 2012

Cooky #6 - Teen-Time Chocolate Nut Bars


Teen Time Chocolate Nut Bars (pg.13).  I can easily say I didn't care for these.  And not just because I find the title to be somewhat off-putting. 

Of course, we still ate them all because, regardless of this recipe's faults, it still had chocolate in it, right?

However,  I just couldn't tell what these were trying to be. They are supposed to be a bar cookie, yet you melt the sugar and butter together like brownies.  But then you add milk to the melted butter/sugar mixture and boil it, which is most definitely unlike brownies.

And they weren't chewy like brownies, either.  In fact, they were rather...spongy.  And spongy cookies are weird in my world.

Now in fairness, I did do a few things wrong.  First, I stirred the chocolate chips in too soon and they semi-melted in the still-warm mixture.  So these ended up being a swirly bar, with no real noticeable chocolate chips in it. 

Secondly, I baked it in a smaller pan than called for - an 8x11 rather and a 9x13.  That could account for a bit of the sponginess, I suppose.

Still, I wasn't impressed by anything these cookies have to offer.  I won't waste anymore time or chocolate making these again.

Monday, March 12, 2012

Baptism Cupcake Toppers and An Annoyance

I spent all of last week, well, the first half, anyway, cutting out giant letters with my Silhouette for our Primary room at church.  We wanted the theme, which is "Choose the Right", in big, bold letters on the wall where the kids could see it all during primary.  I cut each letter out twice...once in green and once in yellow, using the yellow as a border around each letter.  The "the" in the middle, I actually cut out in the shape of the CTR shield.  Even though it wasn't perfectly how I would have liked it, it turned out great, and really adds some spark to the room!  (Maybe next time I take my camera to church I will remember to take a picture!)

In addition to that (not so) little project for church, we had the Baptism Preview yesterday and I made cupcake toppers for the mini cupcakes that were served as refreshments.  I think they turned out so cute!  I made it in Photoshop with a sweet little alphabet and number kit I found on the LDS Blog Train.  Easy Peasy.  I love this site, and am honestly grateful that there are some LDS ladies out there willing to share their talent to create LDS themed digital scrapbook items.  I have found it so helpful in my Primary calling!


I'm linking this to Too Cute Tuesday @ Funky Polkadot Giraffe.


And in other news, I actually found a little time to work on the twins fundraiser quilt a bit this past week.  And it was while I was pressing my seams that I was reminded of why I (almost) always try to buy just a touch more fabric than I think I will need:


Now, a little story about this particular piece of fabric.  After I had cut it out and was placing my fabric, I noticed a spot on this square.  I thought, "Well, let's try to save this," and put some oxy clean paste on it and let it sit for awhile.  After a few hours, it looked like it had done the trick and the spot was gone.  So I rinsed the square, ironed and and sewed it up into the quilt top.

I'm wondering if leaving the oxy clean on the fabric for so long did something that caused this piece to burn, because I had literally barely run my iron over it before it scorched!  Whatever happened to it, I was very annoyed that I had to rip it out and replace it. 

But therein lies the reason I try to remind myself to buy a little extra fabric.  Some people may think, "What is she talking about, reminding herself to get extra?  I always get extra fabric!"  Well, I am probably the only quilter alive that tries NOT to horde fabric!  I never buy fabric without a specific project planned for it.  I try to GET RID of scraps, yes, even THROWING THEM AWAY (gasp!) instead of trying to justify how I could possibly someday use a 1-inch scrap of fabric.  So my natural tendency is to only buy as much as I need to minimize waste, and avoid ending up on the show, "Hoarders". 

Fortunately, I had maybe a quarter yard extra of this particular print, so I was in luck.  And I actually had no trouble tearing it out and replacing it.  It sewed effortlessly into place. Thank goodness for my fairly perfect quarter-inch seams :)


Thursday, March 1, 2012

Cooky #5 - Ethel's Sugar Cookies


I had promised my boys on Valentine's Day that we would make cookies.  It never happened.  I think I promised them at least three more times during the days following Valentine's Day that we would make cookies.  It never happened.  Between family visiting, trying to get things ready for the Preschool Fundraiser (which, by the way, was postponed until May, UGH), I just didn't have time for cookies.  However, in order to keep my word to three little boys, once things slowed down a bit I found some time to made these cookies over the weekend.

Ethel's Sugar Cookies (p.18).  I made them into bar cookies, since that is my new cheater shortcut way to make sugar cookies, so technically, I suppose I can't judge this recipe as I would for regular, roll-out sugar cookies.

However, I can say that I prefer my usual sugar cookie recipe to this one. These were dry (however, I very possibly over baked them.)  And I think I just like the flavor of my usual sugar cookies better. 

I also frosted these with the Butter Icing recipe in the back of the book (pg. 150).  As with the chocolate icing recipe I used on the chocolate drop cookies, I had major issues with this recipe.  First of all, I had to double the recipe that was listed in the book.  The amount of the written recipe was so skimpy, even though it claims to be enough to frost 4 dozen cookies.  Even doubled I had my doubts that it would frost 4 dozen cookies.  The doubled batch barely covered a regular-sized cookie sheet pan of bar cookies.

Now, while I am making these recipes, I have to remind myself sometimes that these are the recipes as they were written back in 1963.  The way people ate was most definitely different back then.  Maybe in 1963 a scraping of frosting over a cookie was sufficient.  But that is not how we roll in this house.  I love frosting, especially on Sugar Cookies, and I need it to be very generous, which this recipe, even doubled, was not. 

So, to summarize, I didn't love these, and won't be making them again.  However, there are a few more basic cut-out recipes in the cook book that I want to try, one being a sour cream cut-out dough.  I have much higher hopes for that one.