

Tuesday, December 25, 2012
Monday, December 24, 2012
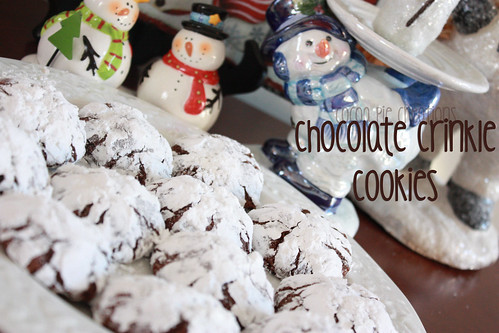
Kid Friendly Food (AND Holiday Tradition!): Chocolate Crinkle Cookies
Mr. Pie didn't bring a lot of Christmas traditions to our family when we got married, which was hard for me, because I come from a big family full of tradition. Games and movies and outings and recipes...there was so much I wanted to bring from my Christmas experience to our family!
But in the beginning, I felt like I really needed to scale back because:
A) Mr. Pie didn't seem to really get into Christmas, and
B) I felt like I would be steam-rolling right over him if I bombarded him with all the things I wanted to bring over from my family.
So really, until we had kids, our Christmases were rather quiet.
However, there was one tradition he did bring... Chocolate Crinkle Cookies.
Every year, the one thing that did seem to make him happy during the holiday season was the package of Chocolate Crinkle Cookies that usually arrived either from his mom or his sister.
According to my husband, they were his grandfather's favorite cookie, and his grandmother would make them every Christmas.
Eventually, the packages stopped being sent from his mother, and the responsibility of carrying on this one tradition for my husband fell to me.
Well, this is definitely a Christmas Tradition I can get behind!
But what's even better is that I now have three little boys who like to help/watch me make "Daddy's Special Christmas Cookies", as they are otherwise known at our house.
And I have a feeling these cookies will become a strong Christmas tradition for them in the years to come. And that makes me happy.
And I have a feeling these cookies will become a strong Christmas tradition for them in the years to come. And that makes me happy.
(recipe taken from the Betty Crocker Cooky Book)
1/2 c. vegetable oil
4 oz. unsweetened chocolate, melted and cooled
2 c. sugar
1 T. vanilla
4 eggs
2 c. flour
2 t. baking powder
1/2 t. salt
powdered sugar
In large bowl, mix oil, chocolate, granulated sugar and vanilla. Stir in eggs, one at a time. Stir in flour, baking powder and salt. Cover; refrigerate at least 3 hours.
Heat oven to 350°F. Grease cookie sheet with shortening or cooking spray.
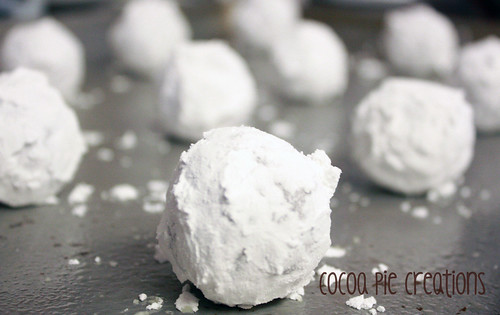
Drop dough by teaspoonfuls into powdered sugar; roll around to coat and shape into balls. Place about 2 inches apart on cookie sheets.
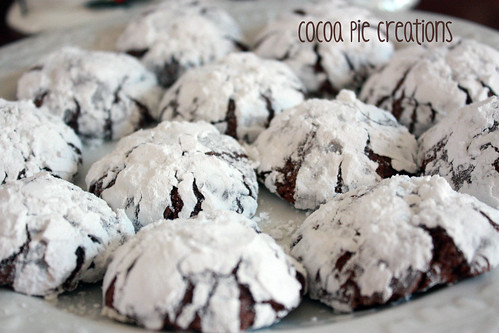
Bake 10 minutes. You want them to still be slightly soft in the center. Immediately remove from cookie sheets to cooling racks.
Tips:
Although it says to just drop the dough into the powdered sugar, I actually roll the dough into a ball before rolling in the sugar.
I also bake these only for 10 minutes. I have found if they are baked longer they will dry out more quickly.
Enjoy!
Sunday, December 23, 2012
Christmas Time Is Here
Christmas is just about here, and before it is time to pack up all the decorations once again, I thought I would post a little photo tour of the Cocoa Pie Christmas House 2012:
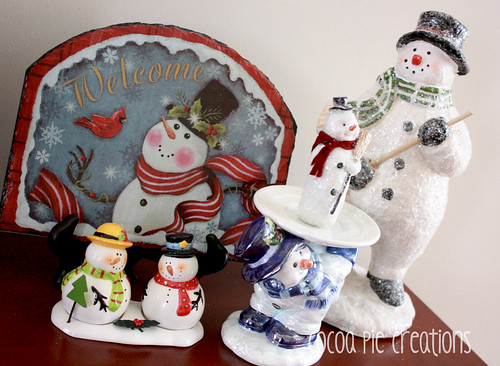
Snowmen
Here is our little snowman collection. It started with just the blue snowman candle holder, which was just a random decoration I had from before I was married. Over the years we have slowly added to our snowman family. The newest addition is the little guy in the red scarf perched on top of the original blue candle holder snowman.
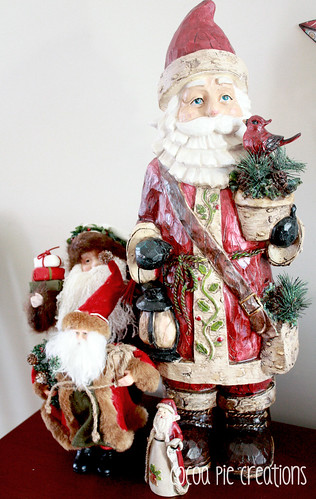
Santas
This is one of two Santa vignettes I have set out. My favorite is the big Santa, which is new to our house this year.
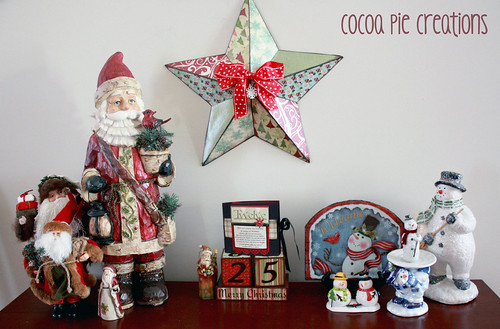
Here is a look at the entire set up, including some countdown blocks that one of my best friends made for me last year, as well as the advent book that she made for me this year, and the paper covered barn star I made this year:
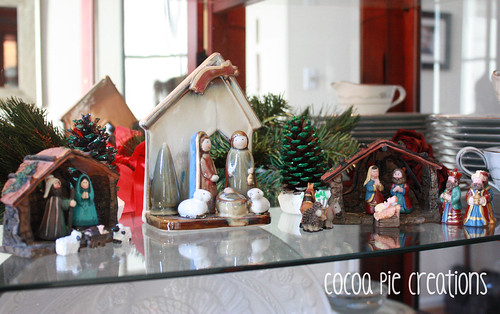
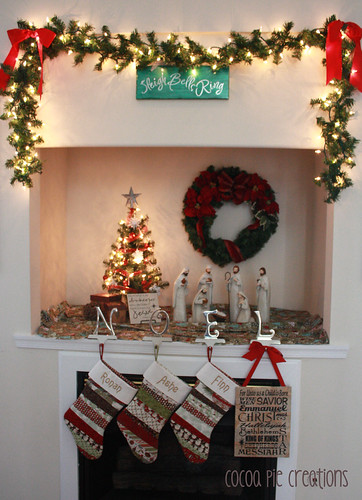
Nativities
For a long time, these little mini nativities were the only ones I had. My mom has sent me all of them. There is a bookstore in Utah, Deseret Book, that usually offers a small nativity for a super cheap price if you buy a certain dollar amount of product. So my mom will usually buy one for me and my sisters as she does her Christmas shopping there.
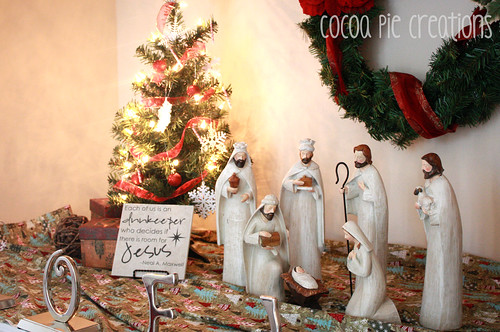
After 8 years of marriage, I finally bought myself a full-sized nativity set. I have been wanting one since before I was married, but just never found one that I liked. This year, especially because the boys are old enough to really start understanding the real reason for Christmas, I knew I needed to get one.
I found this one at Hobby Lobby the first week of September. I knew from an earlier experience at Hobby Lobby that if I saw something I liked, I needed to get it because they don't restock their seasonal products. So, I bought it for 50% off and stuck it in my closet until it was time to decorate.
Poor Joseph has already had his hand broken twice. It made me sad, but with three little boys in the house, what can you do?
"Mantel"
And here is a photo of the stockings I made a few months ago actually hung by the fireplace:

And here is a full view of my weird fireplace. It's not a mantel. It's one of those media center nooks that I hate. I do the best I can, but it is really hard to decorate this weird, stupid nook.
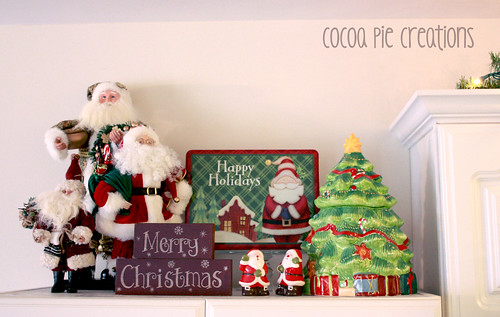
Cupboard
I have a small cupboard in my kitchen that is the perfect place for various decor. So, my second Santa vignette lives up here during the holidays, including an "Irish" Santa that I found and bought to incorporate Mr. Pie's Irish heritage, along with a Christmas tree cookie jar my mom bought me the year my twins were born while she was visiting over Christmas, some little Santa salt and pepper shakers, a cute tin my sister-in-law sent full of cookies one year, and some "Merry Christmas" blocks my sister gave me a few years ago as a Christmas gift.
You can see in the top right corner of the photo the lighted garland that decorates the top of my kitchen cupboards, as well.
And there you are, a little peek into my home, and some of the things that we call Christmas.
I love to put things up that have a story and meaning behind them. I guess I am a little sentimental that way, but I like being able to have a happy memory of a person or event every time I unpack these decorations.
Now go and have yourselves a merry little Christmas.
Thursday, December 20, 2012
A Little Thing
I made my niece a baby doll quilt (among other things I will post about soon) for Christmas. I am also making a gift for her mom, my sister.
As I was finishing up my niece's quilt, I decided to use some of the binding scraps and make this little pincushion for my sister as an add-on to her gift.
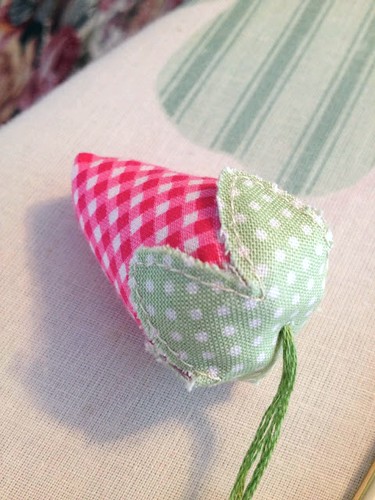
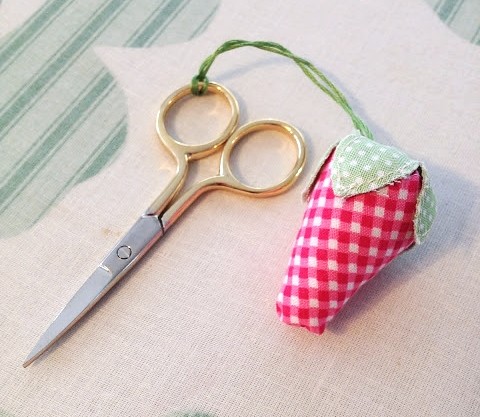
I followed the pattern exactly. It took me about 15 minutes from start to finish.
And I love it so much, I am going to make one for myself and one for my other sewing sister :)
Tuesday, December 11, 2012
Back from Hiatus
I have had a lot going on the past few few weeks. We had family visit for Thanksgiving and took an impromptu trip to North Carolina in between all the normal craziness of the Holiday season kicking into high gear.
While I have been sewing (frantically at times!), I have also had a couple of other projects going on that took priority simply because they had deadlines.
I taught a class at my church on my paper-covered barn stars the week before Thanksgiving.

I am also in the Primary (Children's organization) Presidency at my church, and with the new year comes a new theme and just a general renewal of all the materials we use throughout the year. My current project for Primary was making new binder covers for the Presidency and all the teachers.
Below is a sample of one of the teacher binders. Even though now that they are done I wish I had used the same red paper on the text and the list, I think they turned out really cute!

While I have been sewing (frantically at times!), I have also had a couple of other projects going on that took priority simply because they had deadlines.
I taught a class at my church on my paper-covered barn stars the week before Thanksgiving.

I wish I could say it was a smashing success, but I have come to realize that there are a lot of people out here (I live in rural-ish Virginia) that have probably NEVER paper crafted before. While it should have been a simple "cut and paste" project, I think a lot of people that took it were overwhelmed. Oh, well.
I am also in the Primary (Children's organization) Presidency at my church, and with the new year comes a new theme and just a general renewal of all the materials we use throughout the year. My current project for Primary was making new binder covers for the Presidency and all the teachers.
Below is a sample of one of the teacher binders. Even though now that they are done I wish I had used the same red paper on the text and the list, I think they turned out really cute!

(The empty block is where the class, children's names and birthdays go.)
I used a free kit from Summertime Designs to make the covers. She has some really lovely kits, and they are amazingly all FREE!
Wednesday, November 7, 2012
WiP #26
Not much time today, however, I have a few WiP's to report, despite a crazy busy weekend!
#1 - I have cut out most of the fabric for my nieces baby doll bibs and diapers. Most of it comes from my scrap bin, and I wanted to give a little variety for the little hands to feel and play with, so I have plain cotton, flannel and even a denim one. I am going to embroider their names on the denim bib. I will be lining all the diapers in white fleece.

#2 - Since I cut into a pair of jeans for the bibs and diapers, I finished cutting the rest into squares for my denim rag quilt. I thought I might cut a few squares with a seam in them, just to give a little visual interest and see if I like it. I also saved the denim scraps and cut them into strings to possible throw a few string squares into the mix, too. We will see.

#3 - I made a pieced strip for the backing of my baby quilt with my leftovers from the top, and finally found some perfect fabric for the binding. Now I just need to piece the backing and get quilting!

Linking up to WiP Wednesday @ Freshly Pieced
Tuesday, November 6, 2012
This Is How Nerdy Quilters Get Excited
I was driving back from taking my kids to the pediatrician this morning when I remembered that a new quilt shop was opening in town not too far from the doctors office. So I swung around, intending to just check and see where exactly it was, and if they had an opening date on the door.
O. M. G., they were OPEN!!
So I riled all my boys up until they were squealing with delight about how excited they were to go to the new fabric store!
Now, while it is still nothing like the quilt shops in my beloved Utah, compared to the selection I have here in northern-central Virginia, this place seems almost like an oasis!
I managed to pick up two charm packs. One I need (really, I promise, I NEED it!) to use in my sisters Christmas gift but haven't been able to find locally, and one I just bought on a whim at checkout.

Actually, I have been looking for a Vintage Modern charm pack (which nobody in northern-central VA has, even though it has got to be one of the most popular fabric lines out there), but Marmalade will do for what I need it for. And they had it in a mini charm pack, which is actually perfect. I was going to chop the regular charm pack into quarters anyway!
The Joy charm pack I bought on a whim because A) it was too cute when I actually saw it in real life, and B) because I bought a Flurry layer cake last year for a tree skirt for my brother's Christmas gift, and then decided against it and went with something else. So I've got this lonely old Layer Cake that needs to be used, and I though I could add to it from this charm pack once I decide what to do with it all. (Currently I am thinking either a wall hanging, table runner or pillows. We will see.)
So to recap, I am a nerdy quilter who gets way too excited when a new shop opens in town.
The End
Thursday, November 1, 2012
Costumes of Halloween Past (and Present!)
In honor of a fun Halloween yesterday, I thought I would do a post of the costumes I have made in the past.
I have always loved dressing up for Halloween. I have been making my own costumes since I was a teenager.
I remember one year I was a cat and made my own cat ears out of poster board and crepe paper and a tail out of an old pair of black nylons. I used lipstick to make my nose pink, and it didn't come all the way off. I had a pink nose for the whole weekend.
Another year, I altered a long, (really lovely) hippy dress of my moms from the 70's into a Shakespearean gown. One year a was a Greek Goddess with a handmade laurel wreath in my hair made from a wire coat hanger and tin-foil leaves that I hand cut and glued on, one at a time.
I made a Princess Leia costume one year out of an old bed sheet, cardboard (for the belt) and some cheap silver lame fabric. That as the first time I ever covered buttons in fabric. I even dyed my blonde hair brown with some "wash-out" hair dye that didn't fully wash out for quite a few days.
And one time, I made a super girl costume with no sewing machine! I was at college and didn't have access to a sewing machine. I made the costume out of a long sleeved white t-shirt dyed blue, some felt Superman emblems that I cut out and glued together by hand, and some red costume satin that I made the skirt and cape out of with only a needle and thread and some stitch witchery.
Unfortunately, and don't ask me why, but I have almost no pictures from my Halloween Past!
Then I went through a phase where I didn't really have a reason to dress up. So I didn't.
Once I had kids however, that changed, and I could embrace my love for dress-up once more! And this time, I took pictures.
Here are a few of the Halloween costumes I have made in more recent years:
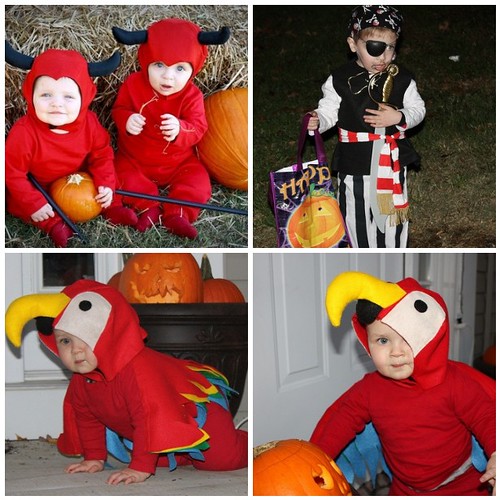
Angel and her Devils -2009
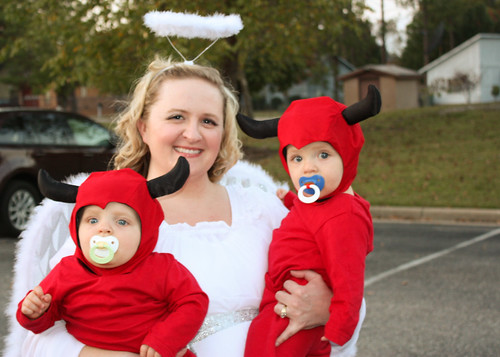
This was the twins first Halloween (2009). I bought the red shirts and sweat pants, and made the devil hats and tails out of red cotton and black satin.
I also made my angel costume, but unfortunately, this is the only picture I have of it, so you can;t see the whole thing. It was a semi-sheer white fabric top with flowing sleeves, and a white, silver glittered satin skirt underneath. I made the ties out of a star-patterned, silver lame-type fabric.
Below are the boys "official" Halloween pics from that year. You can see the devil tail in the second one:


The following year (2010) I had just given birth to my third son, so I didn't make any costumes, although I did have to alter their store-bought ones, since they were a little too big.
2011 my boys were obsessed with pirates. I decided to make their pirate costumes, rather than buy them. Then I got the brilliant idea to make my youngest son a parrot:
Pirate A & Baby Parrot - 2011
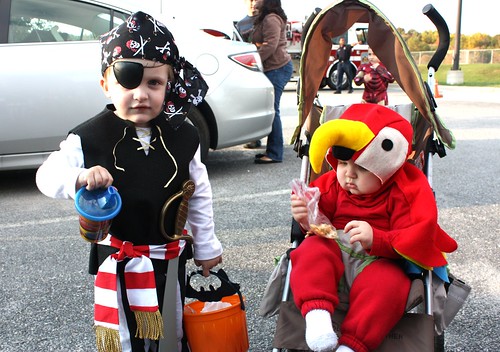
(This is the best photo I have of a pirate and the parrot together. My boys were barely one and not-quite three at the time, so rounding them up for a group photo was pretty much impossible!)
THIS year (2012), my boys all wanted to be Superheroes. Bummer. I'm not even going to bother making Superhero costumes when you can get cool(cheap!) ones at the store. However, that didn't stop me from some Halloween sewing!
My boys decided I was going to be a witch. I figured, I will probably be a witch more than once more in my life, as it is a pretty great go-to costume, however uninspired it may seem. So I decided to make a good, sturdy basic costume that will last me forever.
(You can read about the actual construction of the dress HERE )
The (Not-So) Wicked Witch - 2012

I hope everyone had a great Halloween. We did!
As for me, it is now time to get serious about my Christmas projects.
Saturday, October 27, 2012
Witchy Woman
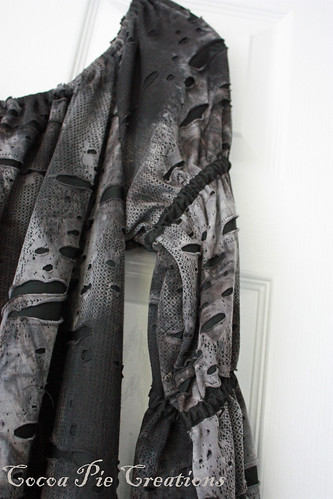
I finished my Halloween costume last night. And here she is, my son-requested witch dress!
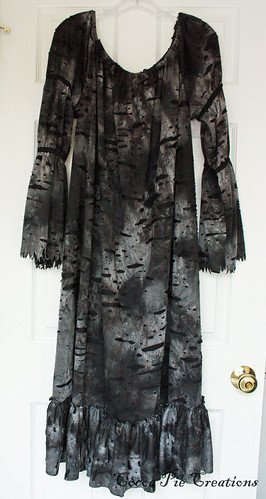
It might not look like much yet, but I am wearing a black vinyl corset over it, which makes a big difference in the look. This piece is just the under-dress.
I was inspired by this pin, which is actually a SCA costume piece. I figured for a witch, I could make it all raggedy, like it had once been a nice dress, but has been worn waaaay too long. In a swamp. With all kinds of yucky witch-brew ingredients spilled on it.
I used Butterick pattern 3906.
I was inspired by this pin, which is actually a SCA costume piece. I figured for a witch, I could make it all raggedy, like it had once been a nice dress, but has been worn waaaay too long. In a swamp. With all kinds of yucky witch-brew ingredients spilled on it.
I used Butterick pattern 3906.
Here are a few detail pictures:
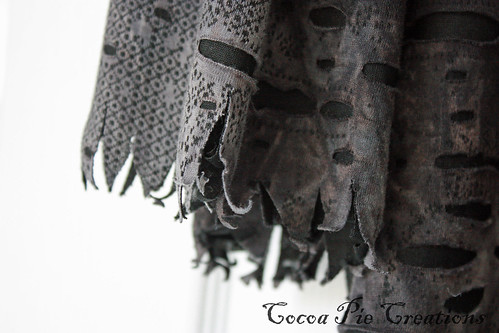
I ragged up the bottoms of the sleeves. I'm debating whether I should do the same thing to the very bottom of the dress.
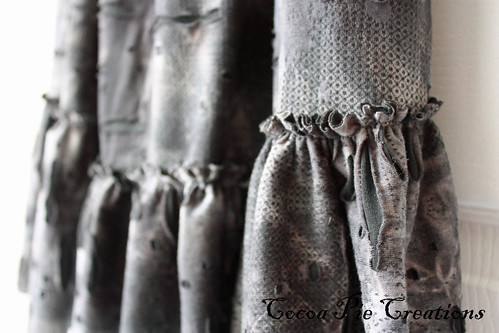
I sewed the ruffle onto the outside of the skirt to give it more visual interest.
I put the black bias tape elastic casings on the outside of the sleeve, again, just to add a little more interest. The casings were the most time consuming part of this really simple project!
I am pretty happy with how it has turned out so far. I'll be honest though, I initially wanted to do a lot more with this costume, mainly adding a tie-on bustle. I still might, but I have a lot of other projects I want/need to get to, so I'm thinking I am going to call this one done. For now.
I made this dress with the idea of being able to use it for years and years. And I have plenty of fabric left in case I decide to add to it next year, or whenever I decide to wear it again.
The fun part is that I can continue adding to this costume as much, and for as long as I want.
And of course, I will post pictures of the full costume all put together after Halloween!
Wednesday, October 24, 2012
WiP #25 - Groundhog Day
I feel like I am repeating the same post from last week, since it is about the same two projects. However, I did finish one (or the top at least!) and made good progress on the second. Next week I will definitely have moved on to some new projects, I promise!
I did finish my quilt top last week (and you get an awesome instagram photo of it):
I did finish my quilt top last week (and you get an awesome instagram photo of it):

On a side note, I really need to figure out a better set up for my photos. I've been taking them on my back porch, cause it just seems to get the best light (sometimes). But I have nothing out there to hang my quilts on to show the full tops. I just hang them over the side of the rail. Maybe I will have to have my husband rig up some kind of a line to pin them to when he gets home.
But anyway, back to the quilt, I did go out and get some backing fabric for it, but I am kindof stuck on what to use for binding. I am thinking the darkest purple color that is in the quilt, but I don't want to do a solid. Hmmm....decisions!
Of course, once the quilt top was done, I moved on to my Halloween costume. It is coming together fairly quickly, especially now that I have the sleeves done!
 |
| Maybe you can't tell from this photo, but this is one of the finished sleeves. The rest of the costume is still a hot mess! This costume has been really easy since I am using knit (don't have to finish any of the raw edges). And since it is supposed to be a raggy witch dress, I don't even have to hem it! The hardest part so far as been sewing the casings onto the sleeves to run the elastic through. And I shouldn't even say that was hard, just more time consuming than anything else, because of having to measure and pin the casing around the outside of the sleeve. It has also been great practice for sewing on knits! I've watched/read a couple of tutorials for sewing on knits and have been happy to practice on my costume, since I do want to try a few knit projects for my boys in the future. Anyway, I have so little left to do, I am pretty sure I will have my costume finished tonight. And I have added one new project to my Christmas WiP list. But it is officially the last new item I am adding to the list for the rest of the year! My Sister-in-Law, who requested doll quilts for my niece last year, requested some more dolly items this year. I am more than happy to oblige, because I know the items I make for Lizzy (my niece) are used and well-loved! So I bought some flannel and fleece to make some baby bibs (my Sister-in-Law's request), but that is just not enough, so I am also going to make some baby doll diapers. And since I am making them for Lizzy, I think I will make some for my other niece, as well.
WiP's Finished:
0
WiP's Worked on:
2
Christmas
Projects:
4 Embroidered Key
Fobs (Various gifts)
2 sets of Baby Doll bibs and diapers
Embroidered Tote
(Mom's gift)
"Vintage Modern"
gift (For my sister, referred to as "Vintage Modern", since she picked out the
fabric. The rest, however, is a surprise!)
Secret Gift
#2
Possible gifts,
if I have time:
Capes for all my
boys
Fleece Blankets for
all my boys and husband
***
Linking up to WiP Wednesday over at Freshly Pieced:
|

Friday, October 19, 2012
Halloween Barn Star
I finished a non-sewing project this week. Say hello to my newest piece of Halloween decor!

I would explain how I did it, but there are so many tutorials online (just google "paper covered barn star tutorial"), I felt that would just be redundant. These really are so simple to make, you almost don't even need a tutorial!
I found some papier mache barn stars online for cheap, so I ordered a couple. Then I got the paper for 50% off at Hobby Lobby. So in other words, this project is really budget friendly!
This is my first attempt at embellishing a barn star, and it was a good learning experience, as far as working with a papier mache base, rather than a metal one.
I used Mod Podge for the entire project here, but I think next time, I will either spray it with a matte clear coat to finish it, or use a spray adhesive to stick the papers on, or both.
I think the two layers of Mod Podge (one layer to stick the papers on, and one layer to seal it) was a little too much for the paper base, because I noticed after the top coat dried, the arms of the star started bowing out a little bit. It is not noticeable looking at it, but I could definitely feel it.
I had initially thought I would add some sort of ribbon or other embellishment, but in the end, I didn't like the way it looked. I felt like it made the star way too "cutesy" for Halloween decor. So I left it plain, and I like it.
Next I am going to make a Christmas one.
For those who don't know, I actually worked at a Scrapbook store for a year while my husband was gone on a 15-month deployment, so I have a little bit of history in paper crafting. (In fact, my former boss at the scrapbook store, Rita, has a darling website, Pink Polka Dot Creations. You really should go check her out!)
And I have to say, I actually loved working with paper again! It's been awhile since I have, and it made me happy to play with it again. So don't be surprised if you see some more paper crafting pop up on my blog a bit more, cause I have a few more things I'd like to try in the near future!
But until then, happy crafting!
(Linking to these parties:)


Wednesday, October 17, 2012
WiP #24 - And Some Randomness
I wish I had gotten more done this past week.
I wish I had at least gotten my quilt top done.
My husband was on a scout camp out Friday night, so I was able to piece all my coin stacks together. And that was as far as I got until last night, when I squared (rectangled?) up all my stacks so I could sew the sashing on. And that is what I am doing right now.

It will be done by tonight, which is perfect, actually, cause I can't do any more on it until I get something to back it with.
Which means I can move onto my Halloween costume, which has seen no progress since last week.
And I can also start on some embroidery. My mom requested a tote with some embroidery on it for her Christmas gift, so I am going to do a few practice items before I commit to her project.
I have a plain black dishtowel that I am going to add a Halloween pumpkin to, and an old apron that I am going to try to revive with a little embroidery for practice.
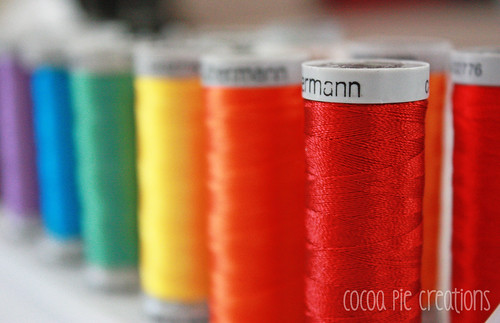
JoAnn's had their thread 50% off this week, so I thought it was the perfect time to go and stock up.
I also worked on my non-sewing project this week, a Halloween barn star. It's not totally finished, but almost. I will post a picture when it is done.
I also had a little craft time with my twins and made this:

And, speaking of my twins, they came home from preschool with these for me:

One of the advantages of having twins is that you get double the love when they make stuff for you at school!
Anyway, here are the stats for this week:
WiP's Finished: 0
WiP's Worked on: 1
Christmas
Projects:
4 Embroidered Key
Fobs (Various gifts)
Embroidered Tote
(Mom's gift)
"Vintage Modern"
gift (For my sister, referred to as "Vintage Modern", since she picked out the
fabric. The rest, however, is a surprise!)
Secret Gift #2
Possible gifts,
if I have time:
Capes for all my
boys
A "Minnie Mouse"
dress for my niece
Fleece Blankets for
all my boys and husband
Linking to Lee @ Freshly Pieced
Wednesday, October 10, 2012
WiP #23 - Making a List and Checking It Twice
This time of year doesn't leave me a lot of free time.
For some reason, October seems to be a packed month here at our house. Between Church obligations (we have our Primary Program in two weeks and I am in the Primary Presidency), my twins school obligations (their fundraiser Bingo is in a month, and I am on the committee), Halloween (Trunk or Treats at both my husbands work and church, plus regular Trick or Treating on actual Halloween night) and my twins birthday 5 days after Halloween, I'm starting to feel the pressure to really get going on any handmade Christmas gifts I plan of making this year.
But yet, with the pressure mounting, I feel like I don't have nearly enough time to get anything done. And then before I know it, Thanksgiving is over and Christmas is fully upon me!
Last year, even though I enjoyed our holidays, I didn't feel as prepared as I usually like to be. I was literally sewing up until the night before the post office deadline to get things shipped before Christmas. I had carpal tunnel for the entire month of January from all the last minute sewing I did.
I don't want to do that this year, so these two projects will be my last non-Christmas gift projects I take on this year.
WiP's worked on this week:
Ellie's Sliced Coin Quilt:

One stack sewn (see it trailing all the way over my ironing board over there?), three to go. I should have the top done by this weekend.

And my Witch costume is all cut out and ready to go:

Like I said, these are my last non-Christmas projects, so I'm not even going to list my old WiP list. From now until the end of the year, I will list my Christmas gift WiP's instead.
Christmas Projects:
4 Embroidered Key Fobs (Various gifts)
Embroidered Tote (Mom's gift)
"Vintage Modern" gift (For my sister, referred to as "Vintage Modern", since she picked out the fabric. The rest, however, is a surprise!)
Another secret gift, which I can't describe at all, since it will be for someone who reads this blog!
Possible gifts, if I have time:
Capes for all my boys
A "Minnie Mouse" dress for my niece
Fleece Blankets for all my boys and husband
***
Linking to Lee over @ Freshly Pieced
Wednesday, October 3, 2012
WiP #22 and a Bit About Halloween Costumes
It is October, and naturally, the projects that take the forefront are Halloween costumes.
Fortunately for me, because my boys have been telling me since January that they want to be Avengers, this year I am only making one costume - my own.
My boys have decided for me that I will be a witch this year.
Again, fortune has it that I made a black vinyl, bodice-type costume piece many, many years ago. I decided to make this the base to build my witch costume around:
 |
| I will apologize right now for the yucky iphone pics today... |
I am going to do a little "upgrading" to this piece to make it a little more sturdy, and hopefully get a lot more years of use out of it. I am going to put eyelets in for the lacing (right now it just has ribbon loops), and I would like to put some boning in the front edges and seams.
I am waiting to get the fabric for the rest of the costume until Friday when JoAnn's has their Columbus Day sale and I can get it for 60% off.
Speaking of costumes, here is a small sample of some of the costumes I have made over the past few years. I will do a post detailing them all once my costume is done:
***
As far as my other WiP, I was able to cut out all the fabric for my Sliced Coins quilt.

I ended up having to go and get some more fabric for the sashing since I didn't have quite enough of what I was originally going to use in my stash, but I didn't mind. I actually wanted a different color, but was going to use what I had just to be thrifty. I'm glad I had a reason to get something I really wanted! I just pressed it and will be cutting the sashing tonight.
WiP's
finished - 0
New WiP's
started - 0
WiP's worked
on - 1
"Love" baby quilt
On the Back Burner: 6
*TWO stockings to finish
*ONE Key fob to finish (and 3 new ones to make for Christmas gifts)
Swoon mini quilt
Denim Rag Quilt
Star Baby Quilt
Couch pillows
WiP's not started yet: 3
Bed quilt (Swoon) (fabric purchased)
Secret gift #1 (fabric purchased)
Secret gift #2
Possibilities/ Idea Phase: 1
Patriotic mini/wall quilt
Linking up to Lee at Freshly Pieced
Wednesday, September 26, 2012
WiP #21
Yay! I have a finish this week!
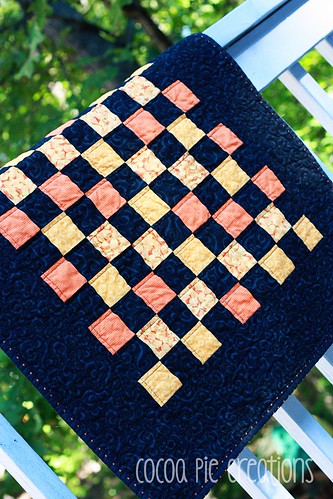
I finished my Halloween Table Topper over the weekend.
I actually have the top made for a smaller version, as well as one lone 9-patch block that I think I may turn into a pot holder. I am in desperate need of pot holders!

I also went through my stash and pulled out and pressed 10 fat quarters to start the baby quilt for my cousin's baby girl who is due within the next 2 months or so! I pulled pretty much all the lavender, aqua and light blues from Amy Butler's Love line. I am going to follow the Sliced Coins Quilt Along over at Don't Call Me Betsy for the pattern. I think it will be an awesome little quilt for a special little girl :)
And this week, I even have a non-sewing project that I am starting!

I ordered these papier mache barn stars last week and they arrived. My plan is to paint them, cover them with various holiday papers, and hang them on my wall for some cute, thrifty decor.
However, I didn't realize that I ordered the 3D stars, rather than the flat backed ones. So, instead of sending them back and exchanging them (and paying twice the amount for the flat backed ones!), I thought I would see if I could just cut them in half. It worked great, but now I have twice as many stars as I need! Ha ha, I guess I know what I will be making for gifts this Christmas.
Here are the stats:
WiP's
finished - 1
Halloween Table Topper
New WiP's
started - 1
"Love" baby quilt
WiP's worked
on - 1
"Love" baby quilt
WiP's NOT
worked on: 6
*ONE Key fob to finish
*ONE dress to finish
Swoon mini quilt
Denim Rag Quilt
Star Baby Quilt
Couch pillows
On the back
burner/not started yet: 3
Bed quilt (Swoon) (fabric purchased)
Secret gift #1 (fabric purchased)
Secret gift #2
Possibilities/ Idea
Phase: 1
Patriotic mini/wall quilt
Total
= 11
Linking up to Lee at Freshly Pieced
Tuesday, September 25, 2012
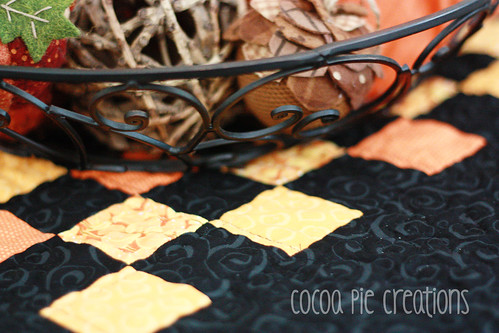
99 Problems...But At Least It's Done (Halloween Table Topper)
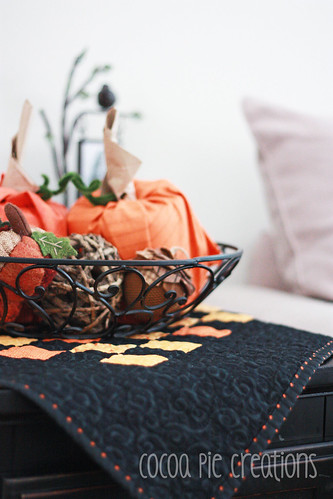 |
| Resting under a bowl with the cute toilet paper pumpkins my twins made last year in preschool. I love how I can mix my projects with theirs for some awesome seasonal decor! |
This poor little Halloween Table Topper.
It all started out so promising. In fact, I couldn't see any problems occurring with this sweet, little thing.
My inspiration was this sweet little doll quilt I saw in the October 2012 issue of American Patchwork & Quilting.

I really love the Primitive look for Halloween, even though I don't actually have anything primitive in my own Halloween decor yet! So the quilts in this photo just spoke to me.
I knew I wanted to make a bigger table topper size quilt for mine, even though the little dolly-sized one is super cute. So I made mine from 2.5 inch squares. Maybe my next one will be made from 1-inch squares.
The top came together quickly and easily. Basting was a cinch. I did some straight line quilting in the center that I whipped out in minutes.
Then I pulled out my new free motion quilting foot.
Ugh.
Problem #1
This is the first time I have tried out the Bernina Stitch Regulator. And while it does make my stitches more even (which is totally awesome), it is definitely going to take some getting used to!
Up until now, I have Free-Motion Quilted with a darning foot, controlling the speed with both the foot pedal, and by how quickly I move the fabric under the needle. That took practice, but I got the hang of it.
With the Stitch Regulator foot, the ONLY thing that controls the stitching is your movement of the fabric. The foot pedal does nothing but "turn it on", if you will. You can floor the pedal, but if you aren't moving the fabric, nothing happens. It's not until you start steering your fabric under the foot that you get any stitching.
So, after years of muscle memory built up doing the "old-style" way of FMQ, you can imagine how clumsy I felt trying to figure out quilting this guy with my new foot.
Problem #2
One thing that would have helped is if I would have stuck to a design I know and love (and am good at!) - regular old stippling. But NOOOOO...I had to get all fancy on myself and try something new. Of course, never taking into account that using the new, automated foot could give me any sort of grief, I went for it. Not. Good.
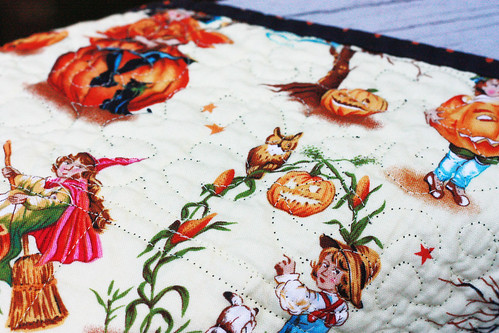
I know it's hard to see in this photo, but it's the best one I could get of the quilting. I tried the design called "Jester's Hat". Even though I was getting a better handle on the design after I figured out a few of my other issues and tried loosening up on the design, I would still hate for anyone to look too closely at my FMQ job on this one!
This picture also shows my Problem #3:
I used black thread on top, and a matching, light yellow thread on bottom. Yeah, shouldn't have done that. As you can see, the black thread pulled through to the bottom, and in places, the yellow thread showed through to the top. However, I was able to fix that once I solved Problem #4, which I will reveal in a moment.
As far as the thread issue, after I was finished and complaining to my sister, she said I should have used mono filament thread. She is right. And I didn't even think about it, because I have never used it before to quilt. Live and learn, right?
Problem #4
 |
| You can see a little of the yellow thread peeking through the top in this photo. |
Problem #4
Again with what I thought was a tension issue, I was getting seriously frustrated. My husband's Aunt was visiting while I was struggling with the quilting of this poor little thing, and was trying to help me figure out what the problem could be. Among many suggestions, she mentioned adjusting the pressure foot as a possible solution.
Duh! It immediately dawned on me that that was, in fact, the issue.
Part of the direction when sewing with the Stitch Regulator foot on is to adjust the pressure foot height to a certain range, and I had totally forgotten to do that. And unlike most other functions on my machine, she didn't remind me to do it once I started sewing, either.
Bad, Mathilde! BAD!
(But I forgave her. It wasn't her fault Why should she have to remind me every time I make a mistake?)
Anyway, even after figuring out all my problems the best I could, I never quite got a handle on this seemingly simple little project. Even the binding made me unhappy!
Problem #99
Not really a problem, but I really wish I would have cut the binding on the bias. By the time I got to the binding, I just wanted the thing done, and since I technically didn't need to do bias binding (no curves), I didn't. But I notice it in how straight the rows of polka dots are. If I had cut it on the bias, I think the dots would have appeared a lot more random on the binding, which would have looked better.
Le sigh. Oh, well. I still love it in the end, and I suppose that is all that matters, right?

Linking up:


Subscribe to:
Posts (Atom)