We don't usually have leftover bananas at our house. In fact, if I let him, one of my twins would eat 4 or 5 bananas in a day.
But on occasion, a banana or two slips by them and ends up too "dirty", as my boys say, to eat. Usually I will make the standard banana bread, or banana muffins, but sometimes I am not in the mood for those. That's when I make this sour cream banana cake.
I've used this recipe for years. I found it in an old cookbook I bought at a thrift store before I was even married. It is especially good if I only have one lone banana that needs to be used, because it is the perfect amount if I half the recipe.
I've used this recipe for years. I found it in an old cookbook I bought at a thrift store before I was even married. It is especially good if I only have one lone banana that needs to be used, because it is the perfect amount if I half the recipe.
I frost this cake with a variety of frostings - usually an old-fashioned, cooked, flour-based frosting that I have seen a revival of on food blogs lately, sometimes chocolate, and sometimes cream cheese. And sometimes I skip the frosting all together and serve it as a plain snack cake, or maybe dusted with powdered sugar.
Today I topped it with a whipped cream cheese frosting recipe from Mel's Kitchen Cafe.
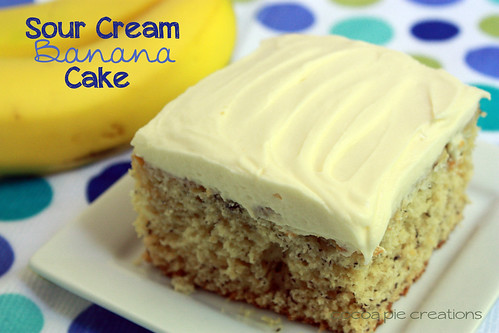
Sour Cream Banana Cake
1/4
c. butter or shortening
1
1/3 c. sugar
2
eggs
1
t. vanilla
2
c. flour
1
t. baking powder
1
t. baking soda
3/4
t. salt
1
c. sour cream
1
c. mashed bananas
1/2
c. chopped pecans (optional)
350°
Grease and flour a 9x13 pan. Cream
butter and sugar until fluffy. Add eggs
one at a time, beating well after each addition. Add vanilla.
Combine flour, baking powder, soda and salt in a bowl. Add to creamed mixture alternately with sour
cream. Blend in bananas and nuts. Pour into prepared pan. Bake 40-45 min.
Note: I halve this recipe all the time and bake it in an 8x8 baking dish, checking for done-ness at 30 minutes.
Note: I halve this recipe all the time and bake it in an 8x8 baking dish, checking for done-ness at 30 minutes.