Wednesday, November 13, 2013

Baby Drew's Quilt

I put the last stitch on this quilt the morning I left my sister's house after a week-long visit to see my new nephew, Drew, at the end of September.

Drew Quilt 

I had it all done and quilted when I left for her house, I just had to trim it, make the binding, and bind it while I was there.

Drew Quilt back 


The fabric is an older line by Moda called Meadow Friends, backed and bound with two different Denyse Schmidt fabrics.  

I was happy to be able to use some of the yellow Denyse Schmidt fabric in the quilt top, too, because it was fabric left over from my other new nephew's quilt that I made earlier in the year (which I have yet to post about!)  I was happy to be able to have a little of the same fabric in both boys quilts.  Kindof ties them together in my mind.

Drew Quilt 2


Once it was done, we put the quilt straight to work during a photo shoot of Drew.  I personally think it did a wonderful job showing off my adorable nephew!

IMG_4876

Thursday, October 31, 2013

Happy Halloween!

**For last year's post on previous costumes I have made, go (HERE)**

***

This year, only one of my boys wanted me to make his costume.  Which is nice in that I don't get totally burned out on costumes by the time Halloween rolls around and it is actually time to wear them!  


Boys 2013


My son decided to go classic this year and be a ghost.  I paid .99 for a basic Simplicity kids costume pattern for the robe and hood, but as usual, didn't bother to follow the instructions for assembly at all. Haha! 

I made it out of bleached muslin and some Halloween "fabric" cheesecloth that I got dirt cheap during a big sale at Joann's.  So, all in all, it was a fast, cheap and easy job...and I LOVE it!  I think it turned out great.  


Ghost Ashe


My son loved it too, and literally looked like a spooky white spectre floating through the parking lot of our church's Trunk-or-Treat.  He rocked that ghost costume!  Which, of course, makes every effort of making homemade Halloween costumes worth every stitch.

Happy Halloween!!

Wednesday, October 30, 2013

All Moved and a Diaper Bag

I realize it has been over two months since posting, but with the move (which happened September 1), my husband deploying two weeks later, and two weeks of traveling and visiting family a week after that, I really feel like I have just gotten here and finally have things in place enough to sit down and post something!

I have actually done quite a bit of sewing since I have been here (one of the "perks" of my husband being gone - lots of alone time in the evening to fill with sewing, I guess!) and I will be posting about them soon, but I will start with a little baby doll diaper bag I made for my nieces birthday (pretty much following  THIS tutorial, except I added side pockets to hold doll bottles, etc.)

The crazy thing is, when she opened the gift she said, "It's a diaper bag!"  Neither her mom nor I could believe that she knew exactly what kind of bag it was without being told. Kind of awesome.  

Apparently, it was just what she needed. 

(Warning: crappy, uncropped phone pics ahead - that's what you get when you have only unpacked half your house and don't know where anything - like your camera - is!)


Wednesday, August 14, 2013

Sew Many Books - A Summer Sewing Series


 photo PicMonkeyCollage_zps8cc13f49.jpg

I'm excited to be a part of the summer sewing series, SEW MANY BOOKS, over at Nap Time Creations today!  Head on over to read my tutorial on how to turn an illustration from your child's favorite book into a wearable piece of clothing!


Extra bonus: you get to see a bunch of photos of my adorable twins! (Who, me biased??  Nah....)

And while you are there, don't forget to sign up for some fun giveaways. 

Monday, August 12, 2013

A Ghastly 241 Tote

I've been wanting to make myself a new bag for awhile.  I've been hauling around the same old diaper bag for almost 5 years now, even though at this point it is pretty empty with my youngest being almost three.  I just don't have the need to haul around a bunch of baby crap stuff anymore!

The problem is I have just been very indecisive about both the pattern and fabrics I wanted to use for a new bag.  I know it shouldn't be a big deal...it's not the first and not that last bag I will make, but I just couldn't seem to get inspired about it.  So I put it off, and put it off, and well, you know how it goes.

However, as I would do my random bag pattern searches, hoping to get a little inspiration, I kept coming back to the 241 Tote...you know, the one that is all over the internet made in every fabric possible?  Yeah, that one.  Let's be honest, it's just a darn cute bag!  So anyway, that was kindof in my mind when I walked into my LQS and saw the new line of "The Ghastlies" on the shelf.  

That was it.  I knew exactly what I wanted to do with that fabric.  And thus, my 241 Tote was born!


The Front:

A Ghastly 241 Tote - Back


The Back:

A Ghastly 241 Tote - Front

Honestly, I can't decide which side I like better!

And here is the interior.  The lining is another print from the "Ghastly" line called "ghastly clovers", I believe.  The other  fabrics are a matching Sketch (charcoal, maybe?) and a random  pink polka dot fat quarter they had in the store.  Truthfully, when I found that pink polka dot in the EXACT shade and tone as the cheeks of the characters, I knew it was meant to be.

A Ghastly 241 Tote - Interior


And I just love this "ghastly" little couple that peeks out at me from the pocket every time I look inside:

A Ghastly 241 Tote - pocket detail

I followed the pattern exactly EXCEPT that I lined the body of the bag with fusible fleece instead of the cotton woven interfacing (I still interfaced the handle and pockets with the cotton woven interfacing), and, as seen above, I made the pocket a little differently so that I could have the polka dot band showing on top.

I just love it!


Linking Up:

Friday, August 2, 2013

Cute Ruffle Butts and a Fun Summer Sewing Series!

This is a little project I finished a few weeks ago and am now just finding time to share:

bdiaper ruffle set

bdiaperrufflebib

 It is essentially the same as the Diaper & Bib sets I made for my nieces for Christmas last year, but with one adorable change...a ruffle butt!

bdiaper ruffle

I had thought about adding the ruffle to the Christmas sets just a little too late, so I knew when I made this one, I wanted to try it.  I think it turned out totally darling!

This set was made for my twins' good friend's little sister (say that five times fast!) for her birthday last month.  She just turned two, and I felt like this could be a gift that she could really grow into and use for years to come.

The only thing I didn't end up loving about this set was the little baby quilt, which was made entirely from flannel from my scrap box.  I used it to practice some FMQ on...and I definitely quilted it far too densely.  It ended up feeling like a place mat, rather than a baby doll quilt!  (I do, however, love the cute bird flannel backing!)

bdiaper ruffle quilt back


***

Something else I wanted to mention:

I'm participating in Nap-Time Creations Sew Many Books sewing series. This is a fun series of posts all about children's clothing inspired by children's books.  How fun is that??

Come back on August 12th to see my addition to this fun series.

Here's who else is joining in the fun this month:
 photo PicMonkeyCollage_zps8cc13f49.jpg

Be sure to stop by Nap-Time Creations on these days for some great giveaways
August 6th- $50 to fabric.com & free Personalized kids book from iseeme.com
August 13th- Pattern Pack from Peek-a-Boo Patterns 
August 20th- Pattern Pack from Coles Corner and Creations & A Remnant Surprise Book
if you are interested in sponsoring a giveaway or participating in NEXT years Sew Many Books series e-mail Emily at nap-timecreations{at}hotmail{dot}com

Wednesday, July 31, 2013

WiP Wednesday -Some Boy Quilts

So I have been trying to sort, pack and purge the past week or so, but I have still sneaked in a bit of sewing!

I posted my most current completed quilt blocks a few days ago (here), but I forgot one so I'm giving her a little recognition today :) 

 This is block #8 in the Virtual Quilting Bee Sampler Quilt.


Sampler - Block 8


The other WiP's I have been working on is this quilt for my new nephew, who was born 2 weeks ago...5 weeks early!  But I was planning to give the quilt when I went to visit for his Blessing the end of September anyway, so no rush on this one:


I have the rows pieced...kindof. Turns out, I ended up sewing 5 of the 11 rows wrong, so I've got a little unpicking in my future before I get this one finished.


This brown and blue star quilt was a random project that I wasn't expecting to start, but I finished the top last night.

This one does have a story behind it.  Some of the fabric in this was salvaged from one of the two matching bedding sets my twins had when they were babies.  When my third son was born, I obviously didn't need two sets anymore, so I decided to make a matching quilt with the fabric from one of the sets for my third son, since neither of my twins wanted to give up the blankets that actually came with the set.

I cut what I had into charm squares, bought some backing fabric, put it in a bag....and totally forgot about it.
Well, now my son is nearly three and won't be in a crib after we move, so what to do with the bedding and the partial matching quilt squares to go with it?  Why, give it to one of my two nephews that have been born within the past 3 months, of course!

To make this super easy for me, I am not quilting it.  This will be a tied, comforter-type quilt instead.  I dug around in my scraps and found enough fabric to make it work without having to get anything else for it (except the high loft batting and yarn).

For an impromptu quilt that has been put together from what I had on hand, it's turning out pretty cute, I think.  In fact, it is cuter than the blanket that actually came with the set!


That is it for this week.  I am packing up my fabric for the move as I type this.  I have two words: Fabric.  Hoarder.


Friday, July 26, 2013

Some Blocks and Some Changes

Yep, I'm here!

Forgive my month hiatus, but things have been changing around here.

While my husband was away at a school for 8 weeks (he left mid-May), my sister came to stay with me.  She brough her two kids - ages 2 years and 6 weeks.  While it was totally AWESOME to have my sister with me for 6 weeks, as you can imagine, having 5 kids ages 4 and under in the house meant almost constant chaos!  

Then my husband came home the beginning of this month...and told me we were moving within the next two months.

The fact that we are moving didn't surprise me - we've known we would be moving eventually.  But we had just decided to stay put for another 10 months, to let the boys finish preschool in the school they love, among other reasons.  So this news was a bit of a surprise and has changed the name of the game around here.

We aren't moving far - just one state north to Maryland (about a 3 hour drive in D.C. traffic!)  And to be honest, I am nervous AND excited about the change.  My husband and I have been married 9 years this year and this will be our 5th move in that time.  This is the first time it has had a noticeable affect on our boys...one of my twins has cried twice about having to leave his beloved preschool/primary teacher. (Insert sad face and mommy-guilt feelings here.)

Amid all this chaos, however, I did get some sewing done!  I am (finally!) caught up with my Virtual Quilting Bee blocks.

Block 9 Sampler
Sampler - Block 10
(Forgive the crazy vividness of this pic.  I could't seem to tone it down - my PS skills are limited!)


 I also finished my Sister's Ten June Blocks.

Block June


Wednesday, June 19, 2013

WiP Wednesday - Catching Up


I have had my sister visiting for the past week or so, and while it has been busy having five kids ages 4 and under rampaging through the house, we have amazingly managed to get some sewing done!

We are both doing the Virtual Quilting Bee over at Diary of a Quilter and decided to use the time we are together to get caught up.  I finished blocks 5,6 &7 over the weekend and have one left to be all caught up.

Block #5

Block 5  Sampler


Block # 6

Block 6 Sampler


Block #7

Block 7 Sampler


Nothing new besides the blocks, but I will have more next week, since I have been working on a birthday gift for the sister of one of my twins friends.  We are going to her birthday on Saturday.  I am making her a doll blanket, diaper, and bib set like the ones I posted about HERE.

WiP's 
Finishes:
none

New WiPs (or WiPs pulled off the back burner!) -
*Doll Blanket, Bib and diaper set

Worked on: 
Blocks

 Not worked on:
Upcycyled Tees - 1 of 3 sewn
Denim Rag Quilt - not worked on
New Nephew baby quilt
Sister's Christmas present


2013 BOM's & Bees - 3 more done!

Sister's 10 BOM blocks - Junes block to complete
Virtual Quilting Bee blocks - 7 finished, 1 to go to be caught up
Applique Quilt -  2 done, March fused but not appliqued, April - June blocks not started

Linking up @ Freshly Pieced

Monday, June 10, 2013

Tutorial - Personalized Baby Boy Flannel Rag Quilt/Cuddle Blanket

It is interesting to see what brings people to your blog.  Even though I have only made one previous rag quilt, "baby boy rag quilt" is one of the top three things that bring people to my blog!

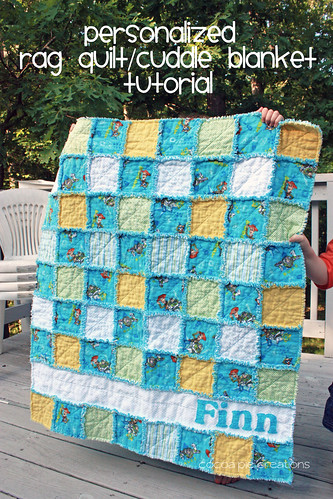
I know there are a ton of rag quilt tutorials out there, but since mine is a little different with the name personalization, and since I was making another rag quilt for my son, I thought I would make it easy for those who come upon my blog in their search for a rag quilt and write up a tutorial for how I make mine.

Finn rag titile cover

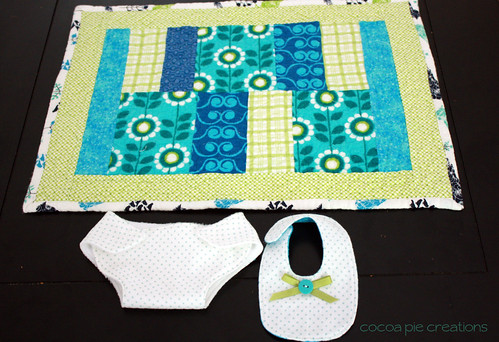
(This tutorial will make a small, lovey-type quilt, about 32x36 inches.  It is the perfect size for a small child to carry around and cuddle with!  The quantities I list here will be for that size.  To enlarge, simply cut more flannel squares until you have enough for the desired size.)

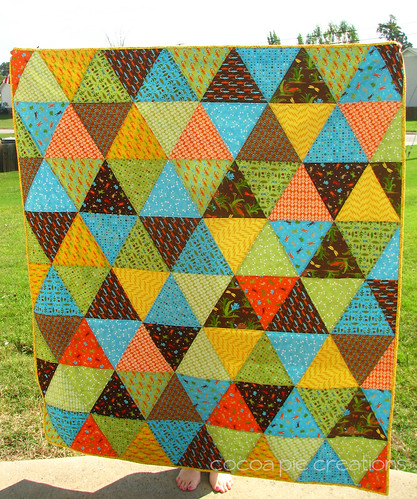
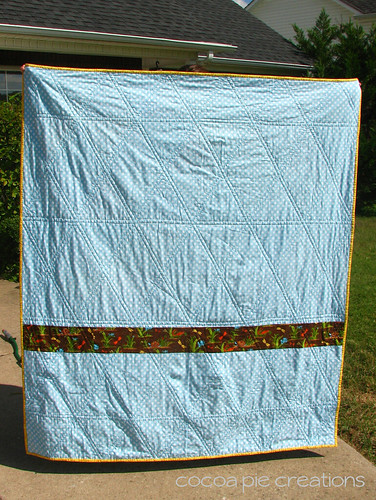
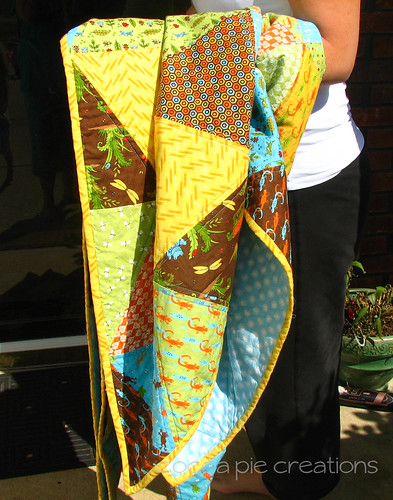
(To see a few more pics of this quilt, CLICK HERE to view my original post.)


You will need:

 - FOR THE TOP - Various scraps or cuts of flannel to equal roughly 1.5 - 1.75 yards - (most of mine were already-cut squares that I saved from my earlier rag quilt, and scraps from some other flannel blankets I had made for my twins, so this is an estimation.  If you do purchase cuts of fabric, I would recommend getting 1/3 yard (or 12-inch) cuts.  A quarter-yard cut would only be 9 inches long - not enough to get two rows of 5-inch squares out of!)

- FOR THE BACKING - 2 yards of coordinating solid flannel

- FOR THE NAME STRIP -  2 strips of flannel, 5-inches x WOF (width of fabric) - 1 in your desired top fabric and 1 cut from your backing fabric

- 1 strip of "batting"
flannel, 4-inches x WOF

-  contrasting flannel scraps for the letters - choose scraps that have high contrast to your background fabric to make the name stand out and easily readable.

Equivalent of 2 yards flannel scraps OR batting for the middle of the quilt - For the quilt pictured, I used scrap flannel for the "batting".  I did not want this quilt to be heavy or too warm, since it was intended as a cuddle blanket for my 2-year-old son.  For my earlier rag quilt, I used actual low-loft quilters batting.  (You can view it HERE if you want to see the difference in thickness, etc.)  The color or pattern for the "batting" flannel doesn't matter since it doesn't show on the outside of the quilt (I used a medium-toned blue, again leftover from my previous quilt), making this a great opportunity to use up random scraps you might have lying around!

- Wonder Under, or other light fusible webbing 

- Sewing Notions - sewing machine, thread, rotary cutter and mat, acrylic ruler, scissors and iron.

Instructions:

First: Prepare your fabric - If you would like, you can wash your flannel.  I usually do, simply because I have found that flannel shrinks quite a bit, and I don't necessarily want it to shrink unevenly or excessively once this type of quilt is finished.  But it is totally up to you.  If you do wash it, I recommend clipping your cut edges with pinking shears to minimize fraying in the wash.

Next, whether you wash your fabric or not, iron your fabric and square it up before cutting.  (If you do not know how to square up your fabric, HERE is a good tutorial you can follow.)


Second: Cut your fabric - Once I have squared up my fabric, I line it up on my mat and cut it into strips 5 inches X WOF (width of fabric - about 42 inches).


I then carefully stack 2 of my (still folded) strips on top of each other, matching all my edges, and line the stack up straight on my cutting mat.  Then, placing my ruler on top of my stack, I line up the edge of my ruler  to the line on my mat closest to the raw edge of my fabric and make a straight cut through all the layers of fabric.   


I them move my ruler down 5 inches, line up my ruler again, and cut again.  Repeat until you have cut the entire length of the strip into 5-inch squares.  


I continue this process with all my TOP and BACKING fabrics until I have 64 squares of each (128 squares total).

I repeat the process with my middle "batting" flannel, EXCEPT I cut it into 4-inch squares.  You will need 64 total "batting" squares.

Here I cut two rows of fabric stacks at the same time. It makes the cutting go so much faster!

Cut the name strip TOP and BACKING fabrics the same as the other 5-inch x WOF strips, but DO NOT sub-cut them into squares.

Cut the "batting" flannel strip the same as above, only cut it 4-inches x WOF.


Here is what you will have when you are all done cutting:


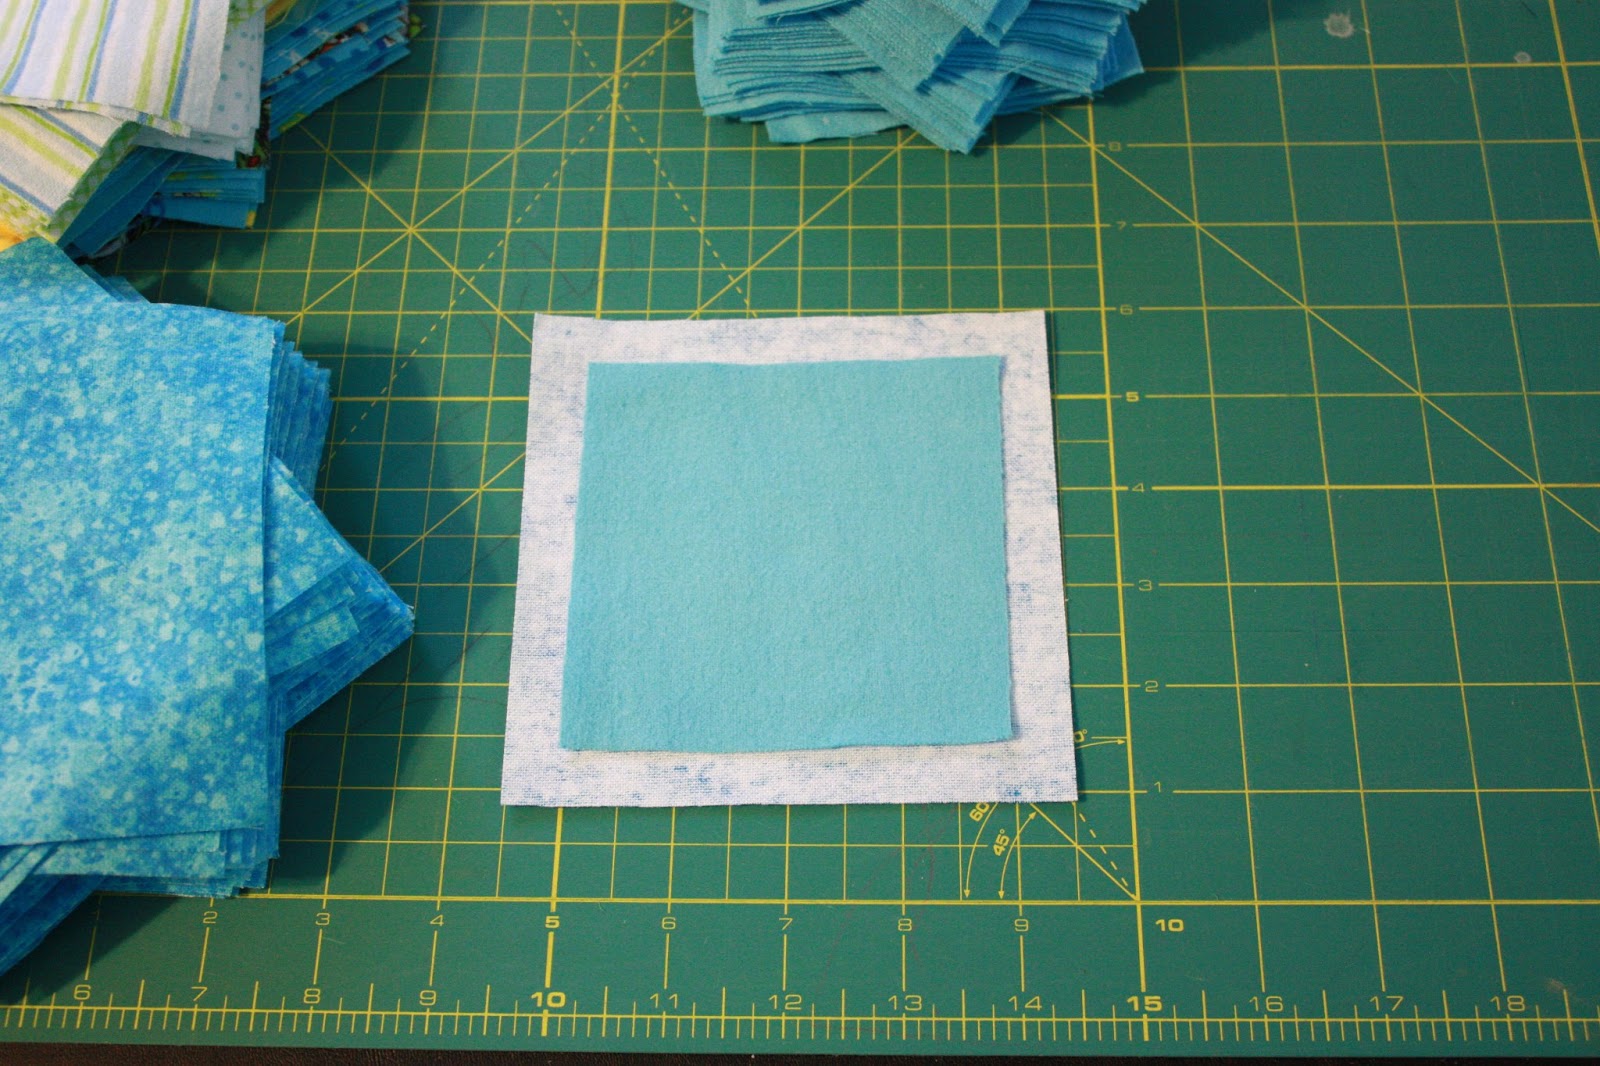
Third: "Sandwich" your squares - Place one BACKING square, wrong side facing up, on your surface.  Center one "batting" square on top.


Place one of your TOP squares, right side up, on top of  "batting" square, matching the sides with the bottom square.  


 This is your square "sandwich".  Repeat this process with all your TOP, BACKING and BATTING squares.

I stack my sandwiches, turning every other one at an angle (as illustrated in the photo below), to make it easy to grab each sandwich while chain sewing.


Fourth - Chain stitch your sandwiches together - The photo below is the only one I took while I was chain-sewing the "x's" through the square sandwiches, so hopefully I can explain the process clearly without any additional photos!  Basically, you want to sew an "X" through each square sandwich  from corner to corner. The easiest way to do this is to chain sew them.  (You can use a matching or contrasting thread.  I used a medium turquoise on all the squares.)  

Place your stack where you can easily reach, and, taking one at a time, begin sewing diagonally, starting at one corner down through the opposite corner.  Without cutting your threads, immediately begin feeding your next square sandwich through your sewing machine, corner to corner, and repeat the process until all your squares have a line of diagonal stitching through them.  They should still all be connected and you will have a chain of 64 squares that you will now separate by clipping the stitches between the squares. 


Once they are clipped and re-stacked, you will repeat the chain sewing, this time sewing down the opposite corners to form and "X" through the squares. Once all your square sandwiches are sewn together, clip them apart and set them aside.


Fifth: Prepare the applique name strip - Prepare a word document with the name you will be appliqueing.  The easiest fonts to applique (and read) are thick and fairly simple.  (I used the font "Rojo".)
Print out a sheet with the letters in the name sized to about 2.5 inches at the tallest point.  Cut each letter out right on the line.

Take your scrap that you have set aside for the letters and make sure your letters will fit on them.  Then cut out a piece of Wonder Under the same shape, but just slightly smaller than the scrap (You don't want any of the Wonder Under to hang over your fabric, otherwise when you fuse it to the fabric, you will also fuse it to your ironing board wherever it is overhanging!) 


Place your scrap flannel onto your ironing board, WRONG side up.  Iron the Wonder Under onto the flannel, rough side DOWN.


Let it cool, then trace your cut out letters BACKWARDS onto the Wonder Under. (You can also trace your letters before you fuse your Wonder Under to your fabric.)


Cut out letters and carefully peel the Wonder Under paper from your applique letter.


Decide where you want your name to be appliqued on your name strip.  I placed mine so that the last letter was  about 2 inches from the right-hand edge of the flannel strip.  You will also want to make sure your name is straight.  Simply line up your ruler evenly along the bottom edge of the flannel strip (In this case, I measured it 1 1/8 inch from the bottom edge) and line up the bottoms of your letters along the top edge of your ruler.  You want to keep in mind that you will have a 1/2-inch seam on the top and bottom of this strip, so place your letters so that they will not get caught in the seams.  Play with the spacing until it is pleasing to your eye.


CAREFULLY remove the ruler without disturbing the letters.  Gently place a hot, DRY iron (NO STEAM!) onto the top of the letters and leave on WITHOUT MOVING the iron for about 6-10 seconds.  Lift the iron directly up and again place on top of any remaining letters, without moving the iron around.  Repeat this process until all your letters are fused to the fabric.


Take your fabric strip to your sewing machine and with a matching (or contrasting) thread, applique each letter down using about 1/8 inch or less border.  This will allow the edges of the letters to eventually get a slight ragged look, as well, after it has been washed a few times.  (If you don't want a ragged effect on the name, you can applique it with a zig zag or buttonhole stitch instead.)


I then make another fabric sandwich with the strips, layering the backing fabric (right side down), the batting fabric, and the top fabric (right side up).  With the strip, however, instead of securing it with an "X" like the squares, I just sewed a line along the center of the strip, ending just before I got to the name, and then sewing another short line through the middle of the strip on the other side of the name.  ( I also basted the top and bottom of the strip to avoid any shifting, as you can see in the photo, but I don't really think it was necessary. So feel free to do that step, or skip it, whichever you prefer.)


Sixth - Lay out your quilt and sew your rows -  Take your sewn squares and name strip and arrange them how you would like them to look in your quilt. 


Gather them up by row and label the rows. 


(I take a picture of the layout with my phone so I can refer back to it if I get confused.) Then I take the stack of labeled rows to the sewing machine and and start sewing! 


 Remember, you are putting your square sandwiches BACK sides together so that the seam will show in the front.  Using a 1/2-inch seam, sew each square in the row together until the entire row is joined.  Repeat for each additional row.  You will end up with 8 rows, 8 squares long.


Once you have all your rows sewn, you are going to sew your rows together.  Again with back sides together, pin two of your rows together along the long side, matching the seams.  I pin and sew my seams open.  


Sew your rows together.  Again, you will sew 1/2-inch seams that will be visible on the front of the quilt.  Continue adding your rows, matching seams, until you have sewn SEVEN rows together. 


For the 8th row, add your name strip, again with back sides together using a 1/2-inch seam.  You will probably have some extra length that will need to be cut off of the strip, so be sure to have the end with the name on it lined up with the right-hand edge of the quilt.  That way you can cut any excess off of the left side - the side without the applique.


Add the final row of squares to the bottom of the name strip in the same way.  Trim the left side of the name strip, if necessary.  (You can use your ruler and rotary cutter if you want, but I just used my scissors to cut the excess off.) 

Finally, sew a 1/2-inch border around the entire quilt.  You are done sewing!

Now comes the FUN part (Insert sarcasm here.)  Clipping!

This part is pretty self explanatory, but you will take scissors and start clipping all those 1/2 seams that you made on the front side of the quilt (and also the 1/2-inch border you just sewed around the border of the quilt).  Make the clips about 1/4 inch wide, or less.  Take care not to clip too far and cut the seam!  


When you get to the "intersections" of the squares,  or the corners where the seams meet, I clip the fold open.  The photo below hopefully explains what I mean.  I'm sure this isn't necessary, but it is something that I do to make sure the clips are evenly spaced and fluffed after the blanket is washed.


Once you have clipped all your seams, throw your quilt into the washer and dryer.  I would recommend checking your lint catcher about halfway through drying, and cleaning it out.  These things shed!  (You can try washing it inside a pillowcase, but I haven't tried that tip yet myself.)  

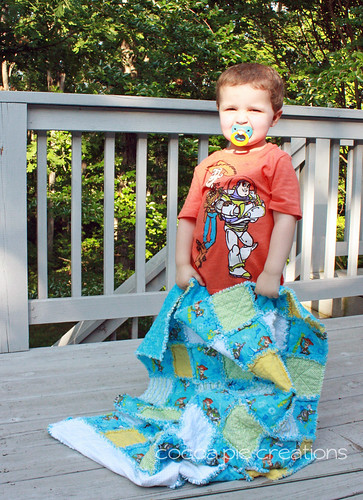
Once dry, give it to your favorite 2-year-old to enjoy :)

Finn Rag Finn


Linking: