Wednesday, September 26, 2012

WiP #21

Yay!  I have a finish this week! 

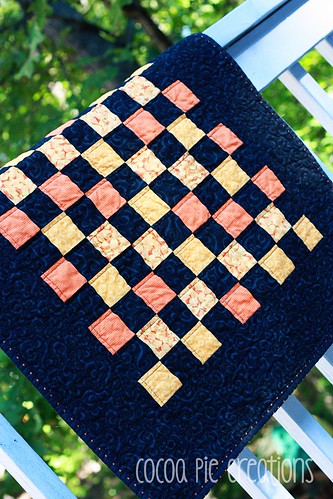
I finished my Halloween Table Topper over the weekend. 
 
 
Halloween 9patch front2


I actually have the top made for a smaller version, as well as one lone 9-patch block that I think I may turn into a pot holder.  I am in desperate need of pot holders!


I also went through my stash and pulled out and pressed 10 fat quarters to start the baby quilt for my cousin's baby girl who is due within the next 2 months or so!  I pulled pretty much all the lavender, aqua and light blues from Amy Butler's Love line.  I am going to follow the Sliced Coins Quilt Along over at Don't Call Me Betsy for the pattern.  I think it will be an awesome little quilt for a special little girl :)
 
 
And this week, I even have a non-sewing project that I am starting!


I ordered these papier mache barn stars last week and they arrived.  My plan is to paint them, cover them with various holiday papers, and hang them on my wall for some cute, thrifty decor. 
 
However, I didn't realize that I ordered the 3D stars, rather than the flat backed ones.  So, instead of sending them back and exchanging them (and paying twice the amount for the flat backed ones!), I thought I would see if I could just cut them in half.  It worked great, but now I have twice as many stars as I need!  Ha ha, I guess I know what I will be making for gifts this Christmas.
 
Here are the stats:
 
 
WiP's finished - 1
Halloween Table Topper 
 
New WiP's started - 1
"Love" baby quilt
 
WiP's worked on - 1
"Love" baby quilt
 
WiP's NOT worked on: 6
*ONE Key fob to finish
*ONE dress to finish
Swoon mini quilt
Denim Rag Quilt
Star Baby Quilt
Couch pillows
 
On the back burner/not started yet: 3
Bed quilt (Swoon) (fabric purchased)
Secret gift #1 (fabric purchased)
Secret gift #2
 
Possibilities/ Idea Phase: 1
Patriotic mini/wall quilt
Total = 11
Linking up to Lee at Freshly Pieced


Tuesday, September 25, 2012

99 Problems...But At Least It's Done (Halloween Table Topper)

Halloween 9patch
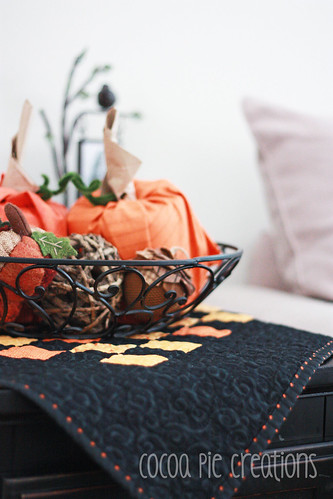
Resting under a bowl with the cute toilet paper pumpkins my twins made last year in preschool.  I love how I can mix my projects with theirs for some awesome seasonal decor!

This poor little Halloween Table Topper.
 
It all started out so promising.  In fact, I  couldn't see any problems occurring with this sweet, little thing.
 
Halloween 9patch front2

My inspiration was this sweet little doll quilt I saw in the October 2012 issue of American Patchwork & Quilting.
 
 
I really love the Primitive look for Halloween, even though I don't actually have anything primitive in my own Halloween decor yet!  So the quilts in this photo just spoke to me.
 
I knew I wanted to make a bigger table topper size quilt for mine, even though the little dolly-sized one is super cute.  So I made mine from 2.5 inch squares.  Maybe my next one will be made from 1-inch squares.
The top came together quickly and easily.  Basting was a cinch.  I did some straight line quilting in the center that I whipped out in minutes.
 
Then I pulled out my new free motion quilting foot.

Ugh.

Problem #1

This is the first time I have tried out the Bernina Stitch Regulator.  And while it does make my stitches more even (which is totally awesome), it is definitely going to take some getting used to!

Up until now, I have Free-Motion Quilted with a darning foot, controlling the speed with both the foot pedal, and by how quickly I move the fabric under the needle.  That took practice, but I got the hang of it. 

With the Stitch Regulator foot, the ONLY thing that controls the stitching is your movement of the fabric.  The foot pedal does nothing but "turn it on", if you will.  You can floor the pedal, but if you aren't moving the fabric, nothing happens.  It's not until you start steering your fabric under the foot that you get any stitching.

So, after years of muscle memory built up doing the "old-style" way of FMQ, you can imagine how clumsy I felt trying to figure out quilting this guy with my new foot.

Problem #2

One thing that would have helped is if I would have stuck to a design I know and love (and am good at!) - regular old stippling.  But NOOOOO...I had to get all fancy on myself and try something new.  Of course, never taking into account that using the new, automated foot could give me any sort of grief, I went for it.  Not.  Good.
 
 
Halloween 9patch close
 
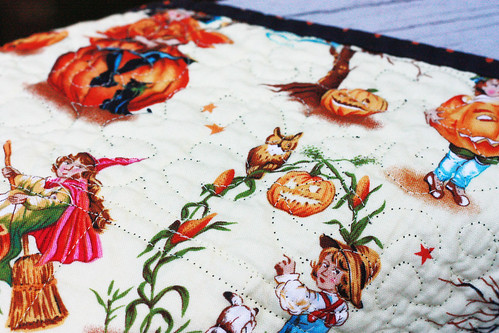
I know it's hard to see in this photo, but it's the best one I could get of the quilting.  I tried the design called "Jester's Hat".  Even though I was getting a better handle on the design after I figured out a few of my other issues and tried loosening up on the design, I would still hate for anyone to look too closely at my FMQ job on this one!
 
This picture also shows my Problem #3:
 
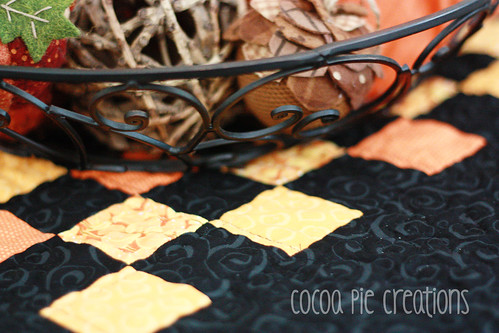
I used black thread on top, and a matching, light yellow thread on bottom.  Yeah, shouldn't have done that.  As you can see, the black thread pulled through to the bottom, and in places, the yellow thread showed through to the top.  However, I was able to fix that once I solved Problem #4, which I will reveal in a moment.
 
As far as the thread issue, after I was finished and complaining to my sister, she said I should have used mono filament thread.  She is right.  And I didn't even think about it, because I have never used it before to quilt.  Live and learn, right?

Halloween 9Patch2
You can see a little of the yellow thread peeking through the top in this photo.

Problem #4
 
Again with what I thought was a tension issue, I was getting seriously frustrated.  My husband's Aunt was visiting while I was struggling with the quilting of this poor little thing, and was trying to help me figure out what the problem could be.  Among many suggestions, she mentioned adjusting the pressure foot as a possible solution. 
 
Duh!   It immediately dawned on me that that was, in fact, the issue.
 
Part of the direction when sewing with the Stitch Regulator foot on is to adjust the pressure foot height to a certain range, and I had totally forgotten to do that.  And unlike most other functions on my machine, she didn't remind me to do it once I started sewing, either. 
 
Bad, Mathilde!  BAD!
 
(But I forgave her.  It wasn't her fault  Why should she have to remind me every time I make a mistake?)
 
Anyway, even after figuring out all my problems the best I could,  I never quite got a handle on this seemingly simple little project.  Even the binding made me unhappy! 
 
Problem #99
 
Not really a problem, but I really wish I would have cut the binding on the bias.  By the time I got to the binding, I just wanted the thing done, and since I technically didn't need to do bias binding (no curves), I didn't.  But I notice it in how straight the rows of polka dots are.  If I had cut it on the bias, I think the dots would have appeared a lot more random on the binding, which would have looked better. 
 
Le sigh.  Oh, well. I still love it in the end, and I suppose that is all that matters, right?

 
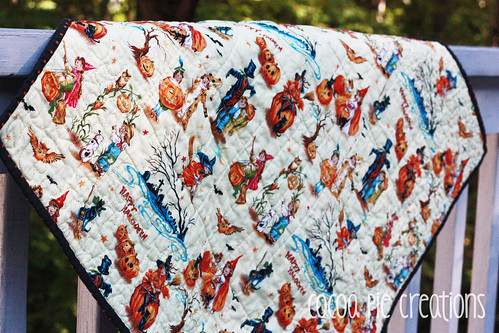
Halloween 9patch back


Linking up:


Photobucket
Fresh Poppy Design
 

Creations by Kara

Wednesday, September 12, 2012

WiP #20 - Christmas/Halloween Mash-Up

So I did it, I finally finished my Christmas Stockings!
 
Stockings v3
 
Kinda.
 
You can read all about them right HERE.
 
Also, I worked on my Halloween Table Topper which may now become a temporary wall hanging until I can get my Swoon mini quilted.


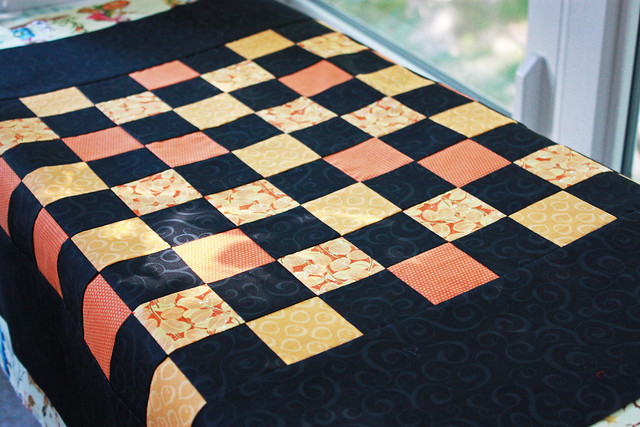
Halloween TT progress
 
I like the primitive look for Halloween decor, and thought this 9 patch kindof fit that vibe.
And I even had enough blocks left over to make a real mini quilt at the same time.  I might keep it, or I may give it away.  We'll see.
 
I also briefly worked on a Pillow cover for my couch.  But I don't like how I started quilting it, so I have tear out the stitches and start over.
 
 
WiP's finished - 3
 
Christmas Stockings 
New WiP's started - 0
 
WiP's worked on - 2
Halloween Table Toppers
One couch pillow
 
WiP's NOT worked on: 5
 
*ONE Key fob to finish
*ONE dress to finish
Swoon mini quilt
Denim Rag Quilt
Star Baby Quilt
 
On the back burner/not started yet: 4
Bed quilt (Swoon) (fabric purchased)
Secret gift #1 (fabric purchased)
Secret gift #2
Baby quilt for Baby Girl Barker (fabric and pattern selected)
Possibilities/ Idea Phase: 2
- dress, matching doll dress, and doll quilt for my niece for Christmas
Patriotic mini/wall quilt

Total = 11
 
Linking up to Lee at Freshly Pieced

Monday, September 10, 2012

Hang the Stockings


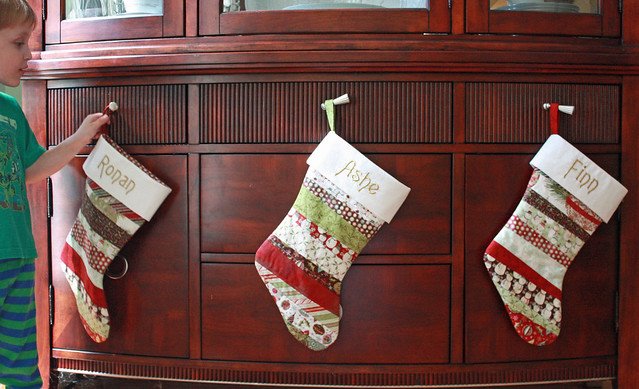
Stockings3
My cute son showing off his new Christmas Stocking
 
May I just start by saying how happy these stockings make me? Mr. Pie and I have been married for 8 years and, especially in the beginning because of deployments, rarely had a Christmas at home, or together. So I never really bothered doing a lot of decorating, even though I LOVE Christmas, and LOVE decorating for the Holiday.
 
 Let's just put it this way, I am the daughter of the guy that the neighborhood nicknamed "Clark Griswold". That should tell you something about how big Christmas was for me growing up.
 
I had a small hodgepodge of random, mismatched Christmas decor from my pre-married life that had mostly been given to me, and that had no real sentimental meaning to me. I would just kindof throw it up on the mantel and walls to make some kind of effort to decorate for Christmas, but it never really did much for me.
 
 Of course, then the twins were born, and my husband got a new assignment that kept him home a lot more.  I started thinking more about traditions, and making memories, especially around Christmastime, and I knew I wanted to do some things that would make our home a cozy, wonderful place during the Holidays where we could grow those memories and traditions.
And for me, part of that was making some special Stockings that the boys would see and use every year.  They are young enough that these will be the stockings they will always know and remember.  And I hope that will mean something to them one day.  
 
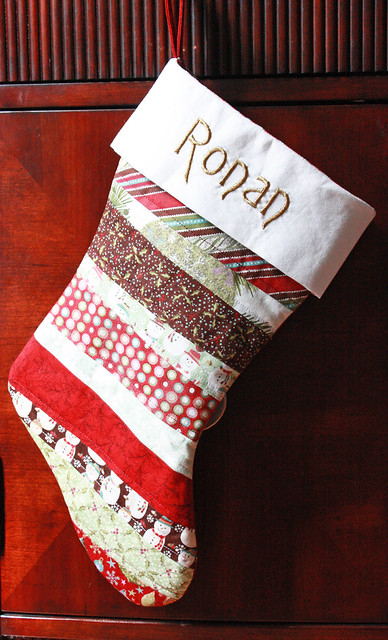
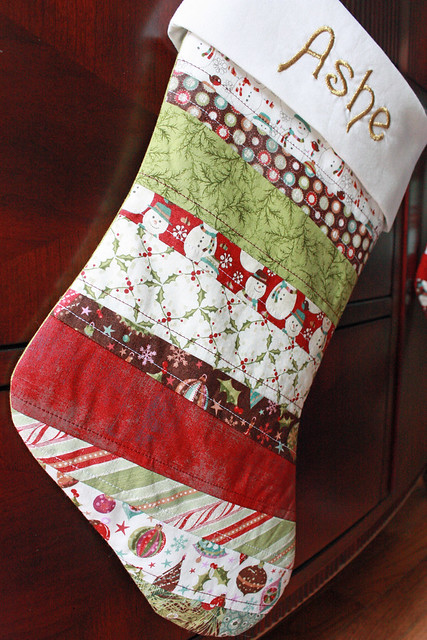
Stockings v1Stockings v2Stockings v3

(Click on any of the above photos to see a larger image)
 
This year, I will be able to put my Tree Skirt under the tree and hang those very Stockings up above the fireplace. And that makes my heart happy.

***
 
Now, on to the actual making of the Stockings!
 
The past two or three weeks have been hectic here in the Cocoa Pie household.  School starting, with meetings and school shopping, church responsibilities, and birthdays to bake cakes for have made my free time a lot more scares than usual.
 
Hence, I feel like I have been working on these Christmas Stockings FOR EVER.  It didn't help that I ended up re-embroidering new cuffs because my first "prototype" was embroidered on the wrong side of the cuff. 

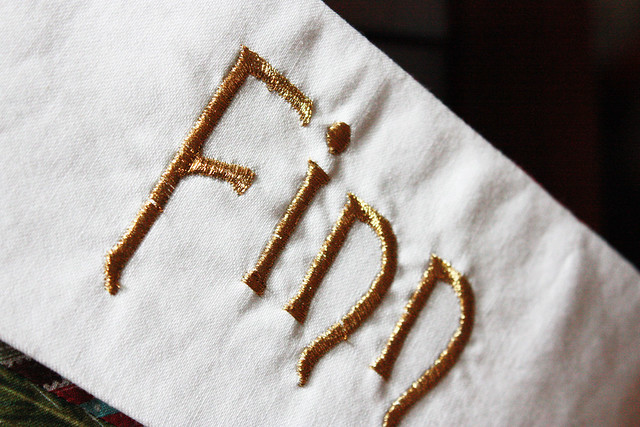
Stockings emb closeup
 
Or that I ended up wasting some time looking for some different fabric for the lining before just deciding to use some that I already had...and ended up loving it, of course.


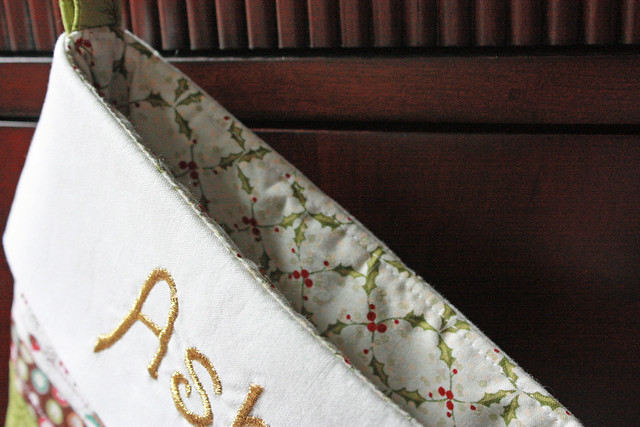
Stockings red lining
Red lining
Stockings white lining
White lining
 But they are finished.  Well, at least three of them are finished.  The most important ones.  The ones that Santa actually pays attention to and fills up with goodies on Christmas Eve.  My three boys stockings.
 
I have every intention on making two more for Mom and Dad.  In fact they are practically ready to finish.  the Stockings are sewn, the linings are sewn, the hangers are sewn.  I just have to make and embroider the cuffs.  But I decided I needed a break from Stockings and will wait to embroider them when I have other things to embroider.
 
These Stockings were inspired by This Tutorial, however, the only thing that is really the same is the strippy piecing.  After that point, I basically abandoned the tutorial and went off on my own.
 
The things I did differently:
 
- I actually quilted the pieced panels onto batting (In the tutorial, she just has you put decorative stitching on the fabric panel without stitching it to batting.)
 
-I adhered fusible fleece onto the back stocking piece and to one half of the cuff before folding it in half.
 
-I interfaced the stocking hanger with some featherweight interfacing and topstitched both sides.
 
-I (obviously) embroidered my sons names on the cuffs.
 
-I topstitched the inside top edge of the stocking to keep the lining down.
 
 
Things I would do differently next time:
 
-My biggest mistake?  I didn't wash the cuff fabric before embroidering their names on.  I didn't think about it until after when I was spraying it to remove my pen marks.  When the fabric got wet around the embroidery, the fabric rippled and it was hard to press it back into shape.  I can only imagine what will happen if I actually have to wash the stockings!
 
-I would try a fusible stabilizer to do the embroidery.  Even with the tear-away stabilizer doubled, I don;t think it was quite thick enough for the embroidery.  I don't know if that was because I was using metallic thread, or if it was because I had pre-cut the cuff fabric to size before hooping it, and it didn't quite fit entirely in the hoop. 

Linking to:

One Thing, One Week Challenge @ Amy's Creative Side

Tip Me Tuesday @ Tip Junkie (for some reason, the button wouldn't work!)

Fabric Tuesday @ Quilt Story
 
Love and Laundry
Photobucket