Pages

Friday, April 11, 2014

Charity Sewing - Infant Layette Shirt

There is a charity organization located in the next town over from me here in Maryland called IMA World Health.  A month or two ago they contacted our Relief Society President at church and asked if we would help provide layette shirts and gowns for their "Safe Motherhood Kits".  To quote from their site, these kits "provide clean and sterile birthing supplies to expectant mothers in areas where infant and maternal mortality rates are among the highest in the world."


Of course, I jumped right on board with this project!  First of all, I try to take any opportunity to serve others with my talents, but also, as a mother of severely premature NICU twins, I have been on the receiving end of  many others service in the form of handmade and crocheted blankets, layettes, even hand-sewn Christmas stockings for my babies while they spent their first Christmas in the hospital.  


When you are in that situation, it is very overwhelming to know that there are so many people out there willing to spend their time and talents to help serve and comfort those in need.  I vowed then that I would do what I could to try to give back to others in a similar way, especially when it comes to babies in need.

The little football player bear shirts were the first ones I made (only one is pictured).  I wanted to hurry and get one made to use as an example for the ladies at church.  I don't have a ton of baby-type fabric in my stash, but did find this old piece that has been hanging around for about 4-5 years now and was able to get two shirts out of it.  

For the rest of the shirts, I tried to go a little more gender neutral, since these will be going to a variety of babies.


While their website has suggested guidelines for the shirts and gowns, it didn't have an actual pattern.  I looked online for something similar, but didn't find exactly what I was looking for. So, to make things easier I offered to draft a pattern for anyone who wanted to help make them. It is a mash-up of the website's  guidelines, 2 other patterns/guidelines I had, plus my own alterations.  

I sewed the first one with french seams, as the website suggests. The enclosed seams are definitely nice for concealing the raw end of the inner tie, but my biggest complaint was that it made the shirt smaller than I wanted.  I wanted them to be fairly roomy, since they will be going on a variety of sized newborns.  So after that, I took to my serger, which neatly enclosed the tie ends into the seams as well as giving it a nice, finished look. It is definitely the way I would suggest finishing these shirts. 

I used both regular cotton fabric as well as flannel.  Both worked great for the bodies of the shirts, but I suggest only using the thinner cotton fabric for making the bias tape ties.  The brown polka dot ties are adorable, but made from flannel, and they didn't want to play nice. 

 Now, If anyone would like to make a layette or two to DONATE to our cause (wink, wink), I would gladly accept any sent to me before the May 1st due date. I can email the pattern. It's hand drawn and not professional in the least, but it works.  (At this point, it is JUST the pattern, not written instructions.  I have been directing the people at church to the IMA website to follow their general guidelines for construction. However, if I had enough people interested, I would write up some instructions to go with it.) 


My email address is: krysllyn@gmail.com
If you want to send a shirt to donate, email me for my mailing address. 


Linking Up:
Fabric Frenzy Friday @ Fort Worth Fabric Studio


Monday, March 31, 2014

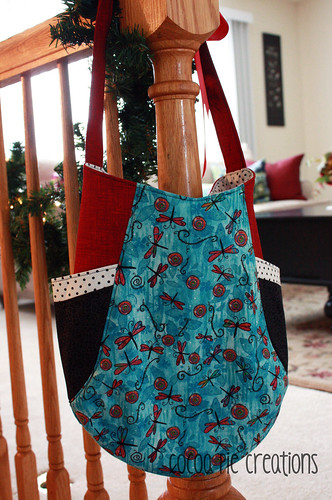
Another 241 Tote

241 Tote for mom

After she saw the 241 Tote I made for myself last summer, my mom decided she wanted one, too.  I told her I would make her one for Christmas, and she was fine with that.

However, then we found out we would be moving, and my mom was able to come out for a week to help me pack.  Since she was in town, I thought it would be fun to take her to the LQS and let her pick her own fabric.

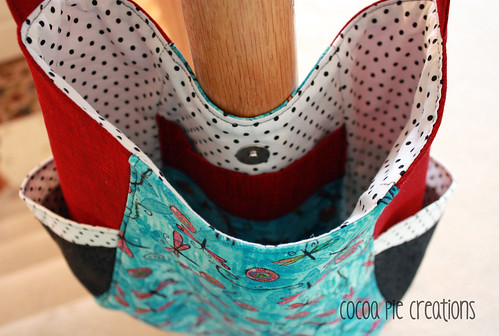
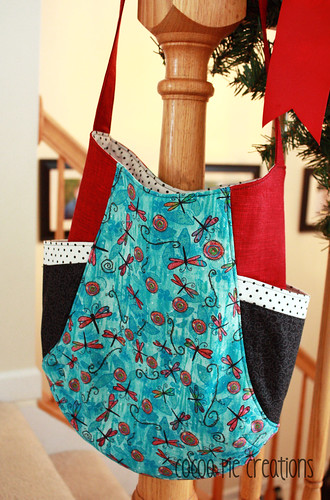
My mom is not a sewer, so she wasn't sure initially what to pick.  I told her to just start with a focus fabric...something that jumped out at her and that she loved.  She decided she wanted something whimsical, and these butterflies fit the bill.  After she picked the butterflies, it was pretty easy to help her find coordinates that she liked.  The only thing she didn't pick out was the lining.  She didn't like anything at the store that day, so I ended up finding this Moda basic dot fabric online a little later.  I think it turned out perfectly!

241 Tote for mom - interior

241 Tote for mom

Thursday, March 27, 2014

Tutorial - Envelope Binding

Every now and then, I find myself making this type of quick little blanket for my boys.


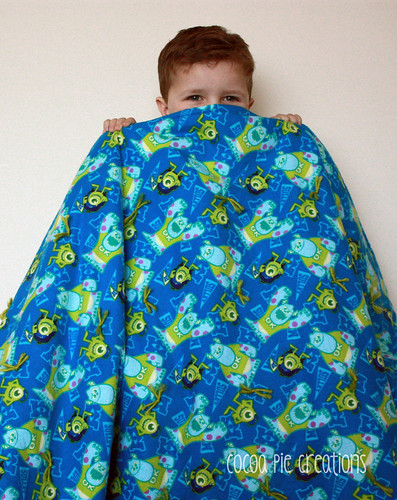
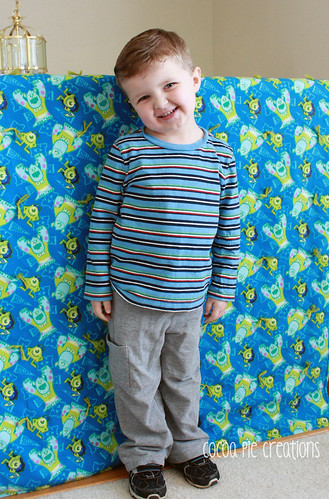
This one, for example came about from my 3-year-old's current obsession with Sulley from "Monsters University" and a trip to the fabric store where he spotted some Sulley fabric.

Envelope Binding Tutorial

I'm not going to take the time to make a pieced quilt out of something he will probably outgrow within the next year.  And besides, when you are three, you want your Sulley blanket RIGHT. NOW. 

That is where a quick and easy tied blanket comes in.  Minimal work for me, and he gets his new Sulley blanket by bedtime. 

This type of blanket is also a super fast option for baby-sized charity blankets.

One thing I like to do on this type of blanket is an envelope binding. I think it makes the blanket look nicer and neater than a folded edge binding, and doesn't take as much time or effort as the traditional strip binding that you would normally see on quilts.

Here is a quick tutorial on how I create an envelope binding.


Envelope Binding Tutorial - Cocoa Pie Creations

First, choose your fabric.  I got 1 1/2 yards of both the top and bottom fabrics for this blanket.  After washing, trimming and sewing, this blanket measured about 40 x 50 inches.  I used flannel, but you could definitely use quilting cotton, or a combination of both, if you want.

I choose to wash my fabric for these quilts, because I am only tying them, not quilting, so I don't want them to shrink too much after they have been tied. You can choose to wash or not.

After the fabric has been washed, I press it and square it up, just like I would before cutting any fabric.  Then I trim my fabric into two, equally-sized pieces.

Cut your batting out to the same size as your fabric pieces.  (I used a low loft polyester batting in this blanket because I wanted it to have a bit of puffiness.  Feel free get a higher loft batting to make an even puffier blanket, but I will say from experience that it is harder to work with.)  

Lay your fabric down in this order: 

1 - top piece, right side UP
2 - Bottom piece, right side DOWN
3 - batting on top of the bottom piece


Pin all around, but I recommend sewing opposite sides together instead of starting at one corner and sewing all the way around the perimeter.  It seems to reduce shifting and stretching of the batting this way:


I sew a 1/2 inch seam using my walking foot.  I highly recommend using a walking foot if you have one. It will also help reduce stretching.


Make sure to leave about a 10 inch opening along one edge of your blanket.


Once you have finished sewing your blanket together, snip off the corners to reduce bulk.


Trim excess fabric around the entire perimeter of the blanket, except for right around the 10 inch opening.  I like to leave the seam allowance on this section longer so that I have more fabric to work with once I have turned it and am tucking it in to press and sew closed.


Now open up your blanket at the opening, reach in, and pull the right sides out.


Using a crochet hook or another turning tool, poke your corners out, and press.


Now, pinning the opening closed, press the entire perimeter.


 Once the entire edge is pressed, take a needle and thread and sew your opening shut.  I prefer using a blind stitch.


At this point, tie your blanket.  (I recommend tying the blanket over quilting, because at this point, the blanket is bound and there is not a lot you can do about any shifting or puckering if you were to quilt it.  However, a very large and simple straight line design may work if you decide to try quilting it.  I have never done it myself, though, so I can't say how well it would work.)  

Another option if you want a quilted look is to quilt the top onto the batting before you add the backing fabric.  However, you would still need to either tack or tie the backing fabric onto the front fabric once your envelope binding is done.

Now that your blanket is tied, this is how your envelope binding looks:
  

Definitely nothing wrong with it, and you could leave it like this and your blanket would be just fine.  However, I like to add one last step and sew a 1/2 inch edge around the perimeter of the blanket.  It gives it the look of being bound, and is a nice finishing touch.


And there you have it!  A fast, easy blanket with a sweet, envelope-bound edge...


...and one very happy boy!

Monsters Blanket

Linking Here:

Saturday, March 15, 2014

Project Linus Charity Quilts

Last fall, my Relief Society group did a service project of making and donating quilts and blankets to Project Linus. We ended up donating somewhere between 40-50 blankets, if I remember correctly. 3 of those were my contribution.

The best part about these quilts is that all the fabric was donated! I was visiting my sister in Tennessee and we happened to pull out her (humongous!) tote of fabric to look for a particular quilt top. While digging through, she came across two very large cuts of  rather beautiful batik fabric that she had gotten from her Mother-in-Law a few years back. Her MIL had intended to make quilts out of them, but never did and was going to throw the fabric out when my sister rescued it. 

My sister was more than happy to pass it along to me to turn into quilts for our Project Linus service project.  I decided not to do anything fancy, just whole cloth and machine quilted. I had quite a bit of large sized leftovers that I was intending to make another, pieced quilt top out of, but ran out of time. 

These pictures aren't the best, and really don't do the quilts justice because I took them with my phone, inside, at night, as I was literally running out the door to the activity!


The above photo is the only finished quilt I have a picture of, but the second one was just like it.  The third one was a small, unbound, tied blanket I found in a box last summer.  I threw a binding on it and donated it, also.  The photo below is a glimpse of it as I was binding it.


The most rewarding part of the whole project was when I got an email from the mother of one of the girls that received one of my quilts while at Johns Hopkins.  It was very touching, and so rewarding to know that my service is being received with love and gratitude.  It makes it all worth it.